Concrete Numbers
by drjSo i made a house number for my friends out of concrete. This is a story of how the number 14 gets sketched, photographed, digitised, printed, traced, cut, cast, taped, painted, and finally mounted onto the wall of my friends’ house.
Parts of this process i was quite familiar with: lettering, linocutting; other parts i was not at all familiar with: working with concrete, gluing things, exterior paint.
Overall i would recommend working with concrete if you are tempted. At the maker/hobby level i think there is a lot you can do with it.
Questions going in
- Can you cast onto a linocut (take a cast of a linocut)? Answer: yes.
- Can you make a linocut with bathroom lino? Answer: Well, you can cut it, i haven’t tried making a print yet.
Learnings
- Bathroom lino is okay to cut. It’s a bit spongy so the matrix moves as you’re cutting it. And it’s a bit shallow.
- Can cast concrete onto Lino.
- Sculpting with modelling clay is a nightmare...
- ... and the modelling clay bonded to the concrete.
- Liquid vaseline is a good separating agent, but doesn’t stop the modelling clay from bonding with the concete—i’m not sure that anything would.
- 8 hour Araldite is good (for gluing metal fixings to concrete)
- For painting concrete Hammerite is okay, but Humbrol enamel is good.
Brief
Ad hoc, and partly reconstructed after the fact.
As soon as i saw pictures of my friends’ new house i could see that we needed to do something about the house number, which was a fairly bland B&Q type plaque. As their “friend who is into fonts” i assigned myself the task. The vibe i was going for was “no parcel shall go undelivered for lack of clarity over house number”.
Pencil sketches
Sketching is probably the most influential part in terms of the art and design. I wanted a clear functional design, rather than an ornate one. House numbers serve a function: to denote the house.
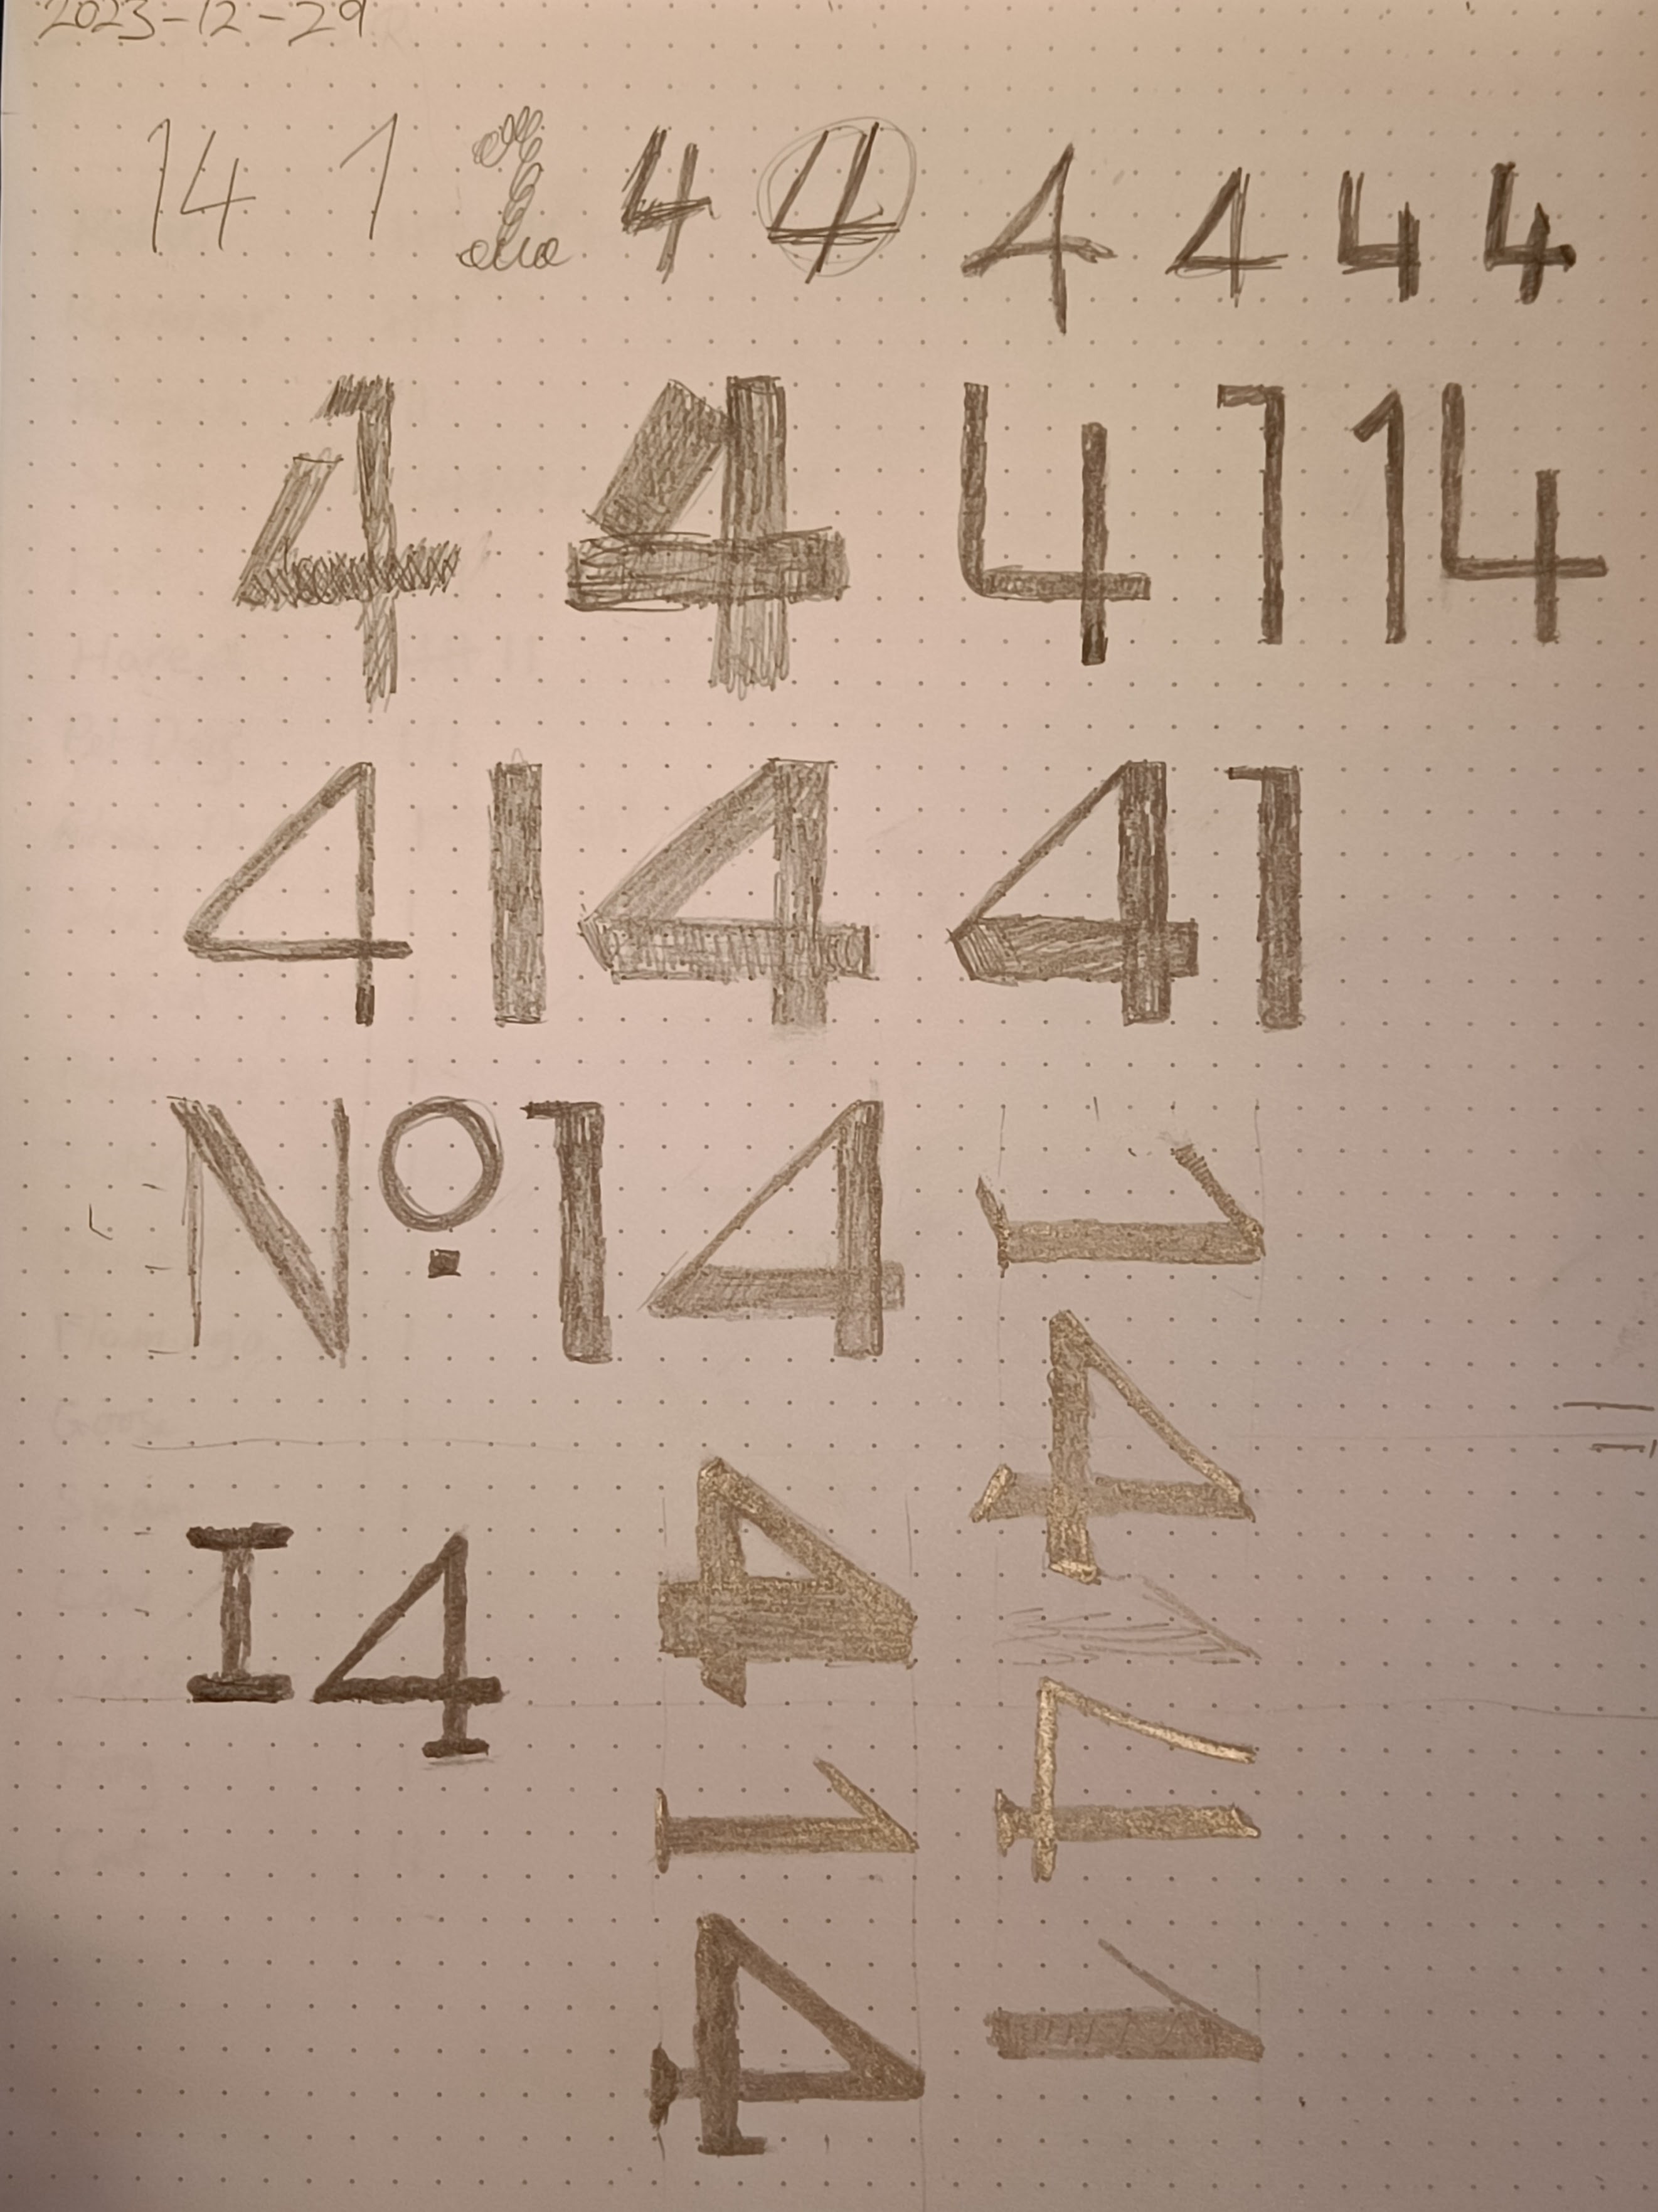
The selected design can be seen at the right-hand end of the 3rd row.
Material Design
Both before and after the pencil sketching i was thinking about the methods and materials. I figured that the flat design would not influence or be influenced by my choice of materials; i didn’t feel like i had to finalise the design before choosing materials or vice versa. The material list included wood, stone, lava, Dibond (a composite panel), Corten (weathering steel), as well as concrete. The mark/method list included PU paint, etching, pyrography, UV Ink, glass, modelling, stencil.
The eventually realised design is a combination of modelled concrete with enamel paint over.
Budget and time constraints are somewhat ridiculous / immaterial. If you want a house number go to B&Q: screw-on numbers are a fiver each and a plaque is around GBP 30. And, they’re fine; they’re not high art (but then, neither is mine), but they are perfectly functional. Every house in your neighbourhood has these and no one thinks it’s bad.
If you want something really fancy you can get stencil-cut Corten for about GBP 75 per glyph.
I had to do the project because i love the idea. And i do.
Digital stage
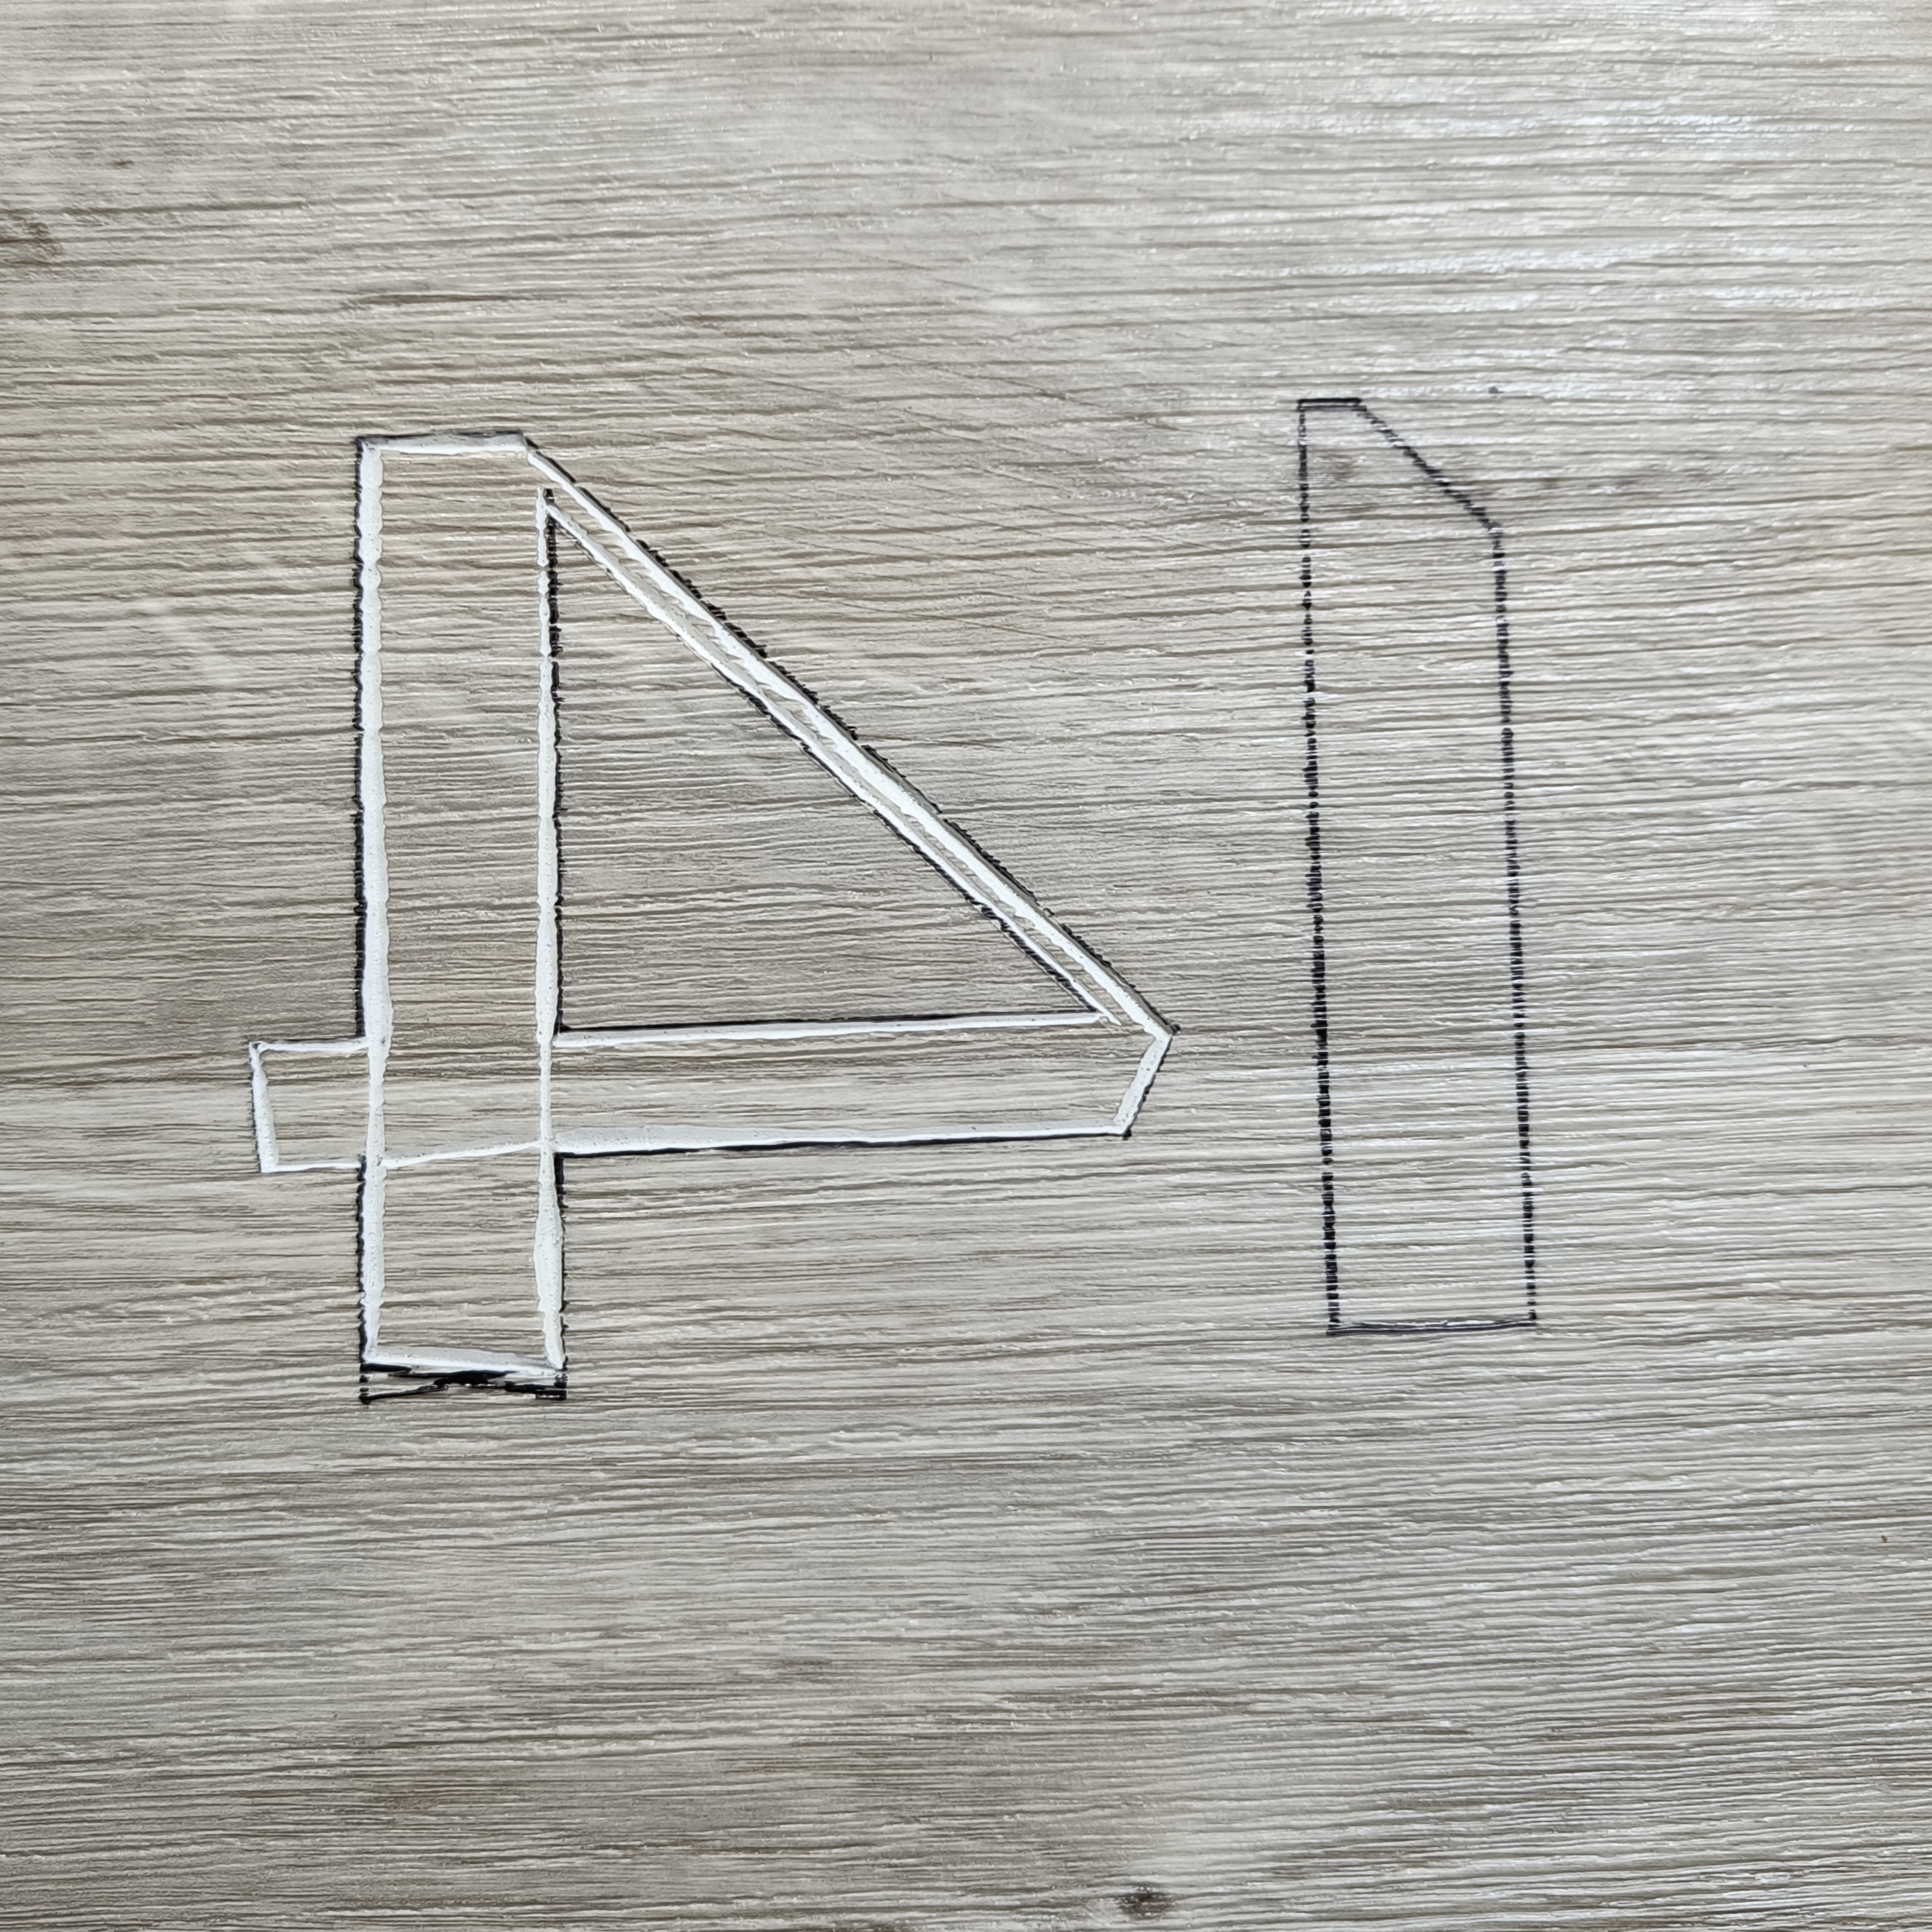
The 30mm high pencil sketch was photographed with my phone and imported into Glyphs for digitisation. I made a version of the 4 that is reasonably close to the pencil sketch, but it was modified somewhat in the digital stage.
The digital version used for laser printing is the canonical version. The overall shape is the same as the sketch, but the thick/thins have changed a little: the pencil sketch is thicker in the horizontal stroke; the digital version is thicker in the vertical stroke. The digital version is slightly more conventional in this regard, but looking at published fonts shows that there is considerable variation in the thick/thin strokes of 4.
The digital version requires making some very definite decisions that a pencil sketch can leave somewhat ambiguous. These are all things that require a bit of fiddling to judge, and i find it much easier to do that digitally:
- Should the strokes be perfectly straight or should there be (reverse) entasis? Straight.
- Should the thin stroke taper? No.
- Where the thin diagonal joins the horizontal and vertical strokes, how much corner should be clipped? A little.
- Decide at what angles the three strokes should be terminated, and how much baseline overshoot to have (a little).
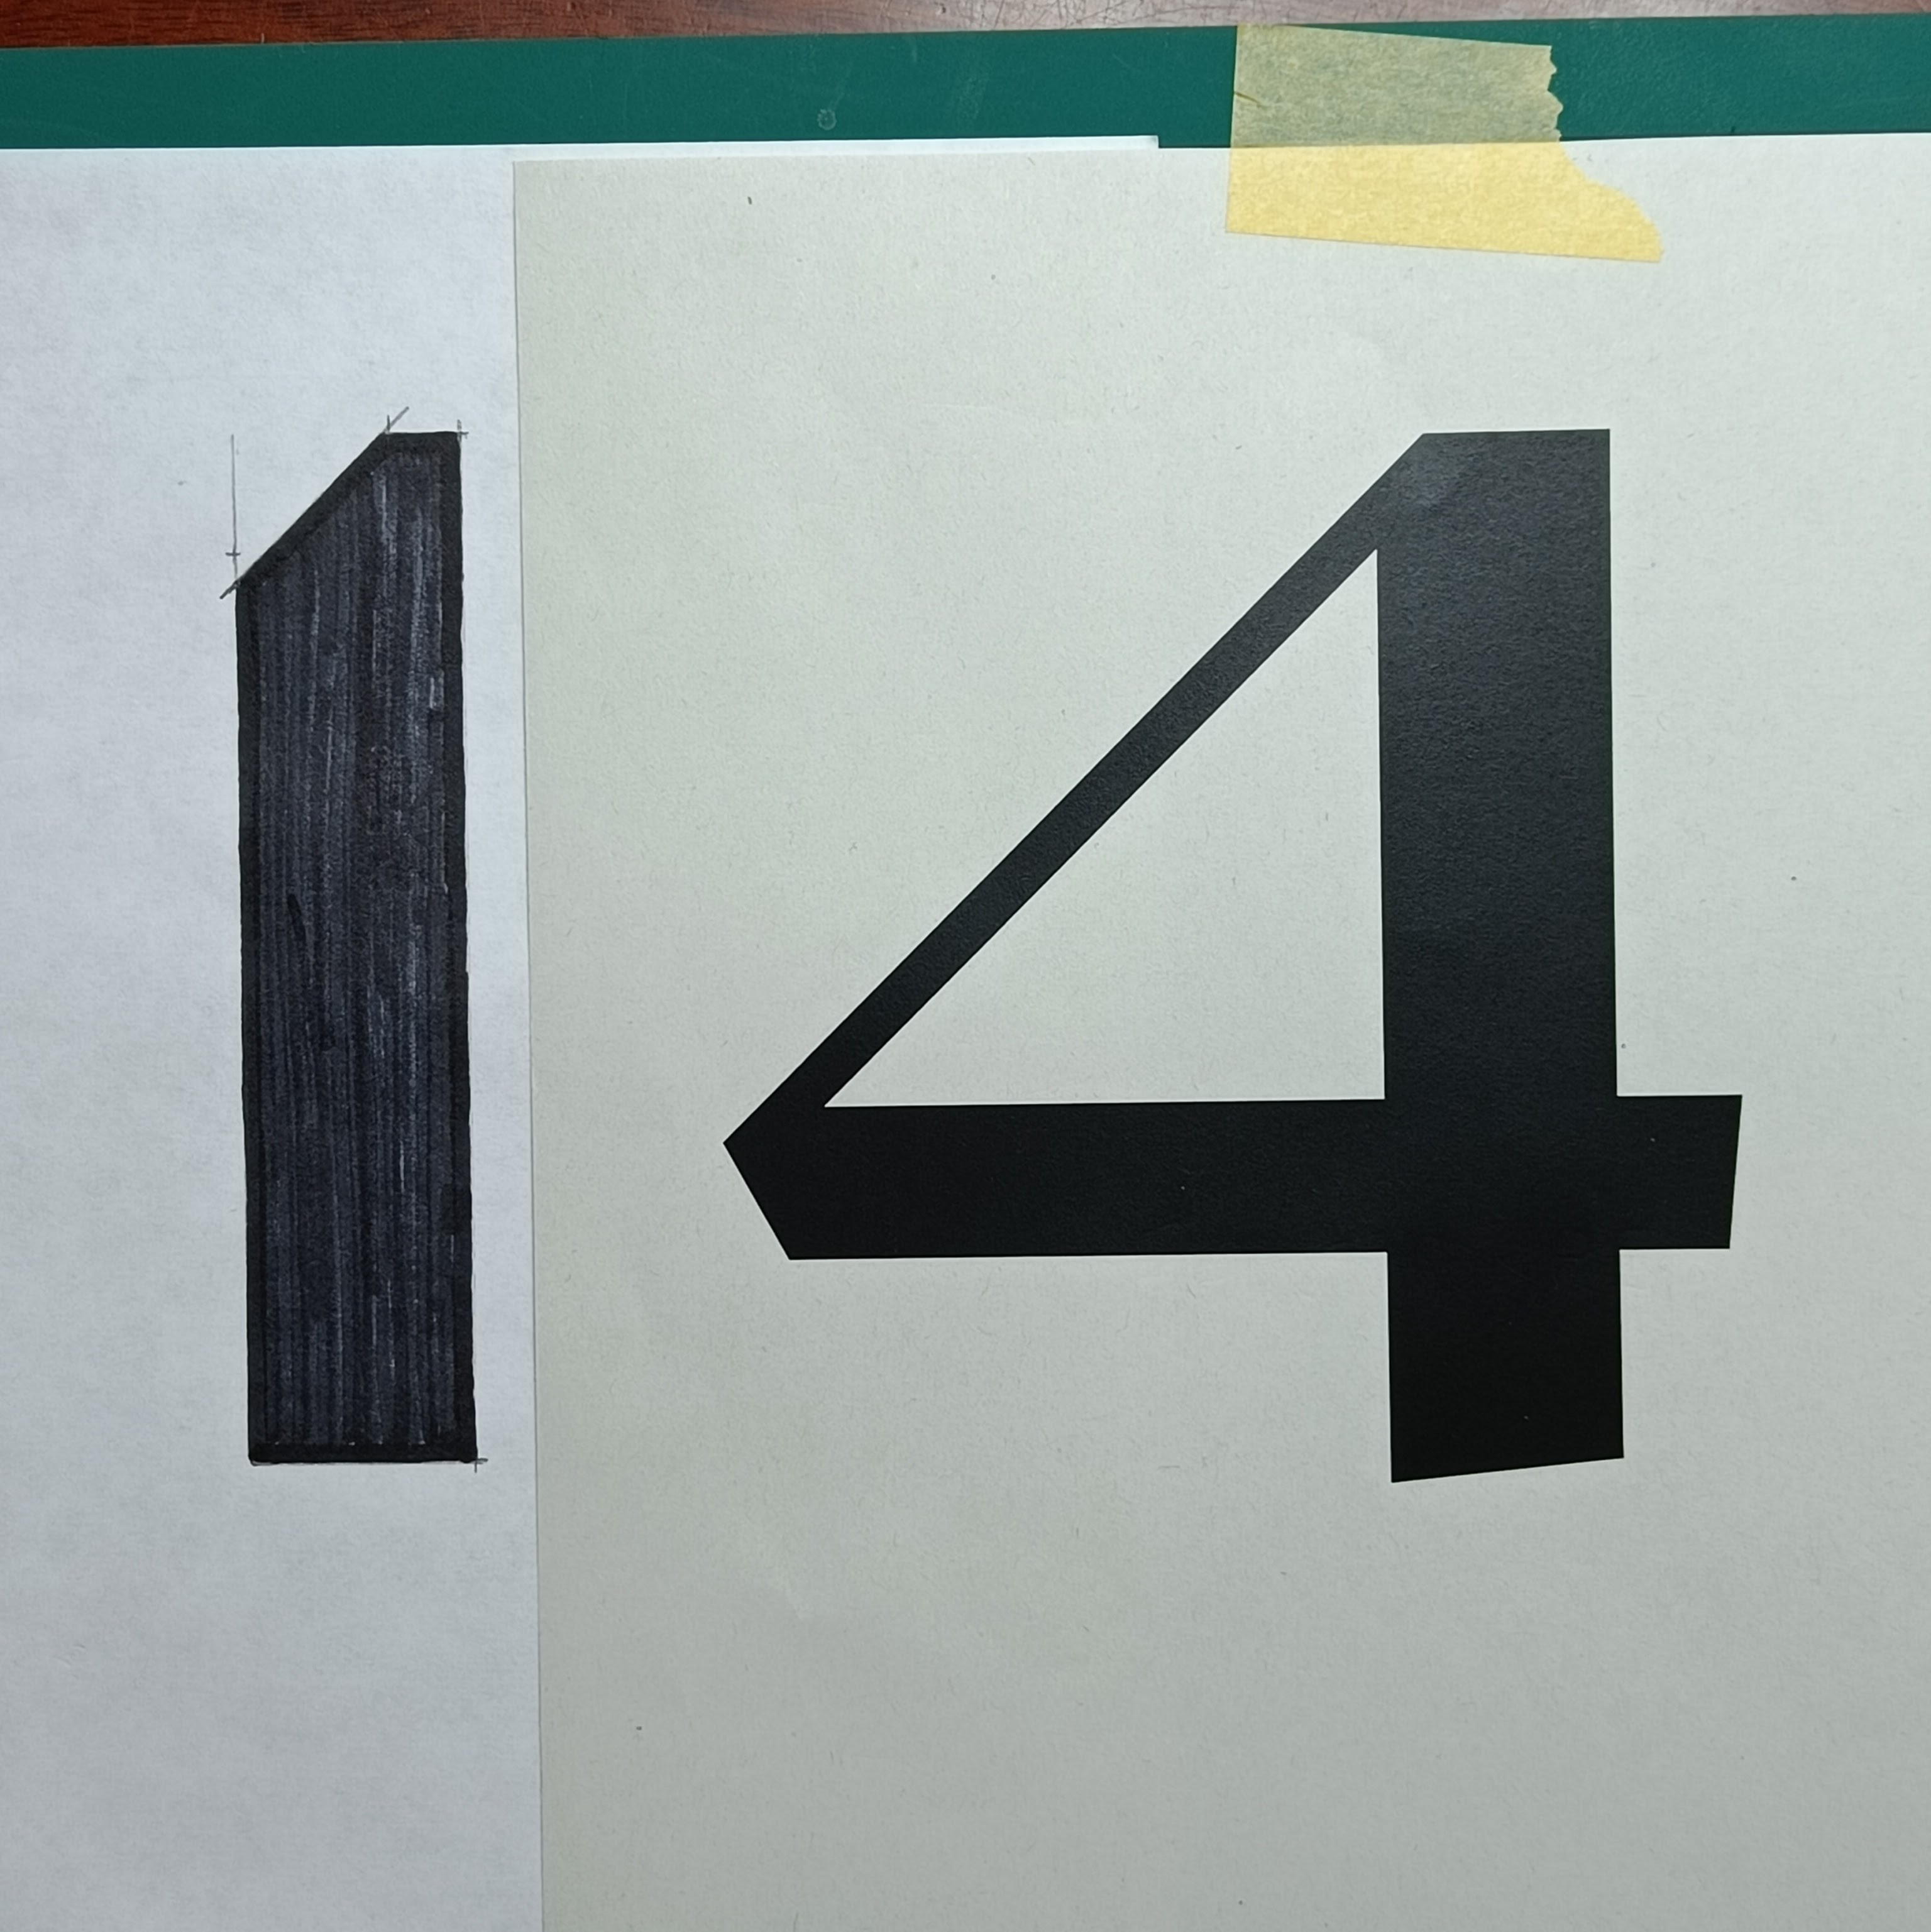
It was at this stage that the design of the 1 changed. I’m not excited about the design of most of my 1s and in this fairly undecorated san-serif style the design is basically a vertical rectangle.
The pencil sketch has a rectangle + a short stick, the redesign has a rectangle with a corner clipped out. I like that the strong angle of the 4 is echoed in the 1 and that’s just enough to stop the 1 from being just a rectangle.
Laser Printing
The 4 was laser printed at final design size, 120mm high. For someone reason i didn’t print the 1 as well, but no matter, i drew it with a ruler on another piece of paper. I can then slide the paper around to decide on final spacing. And fix that to my mat with tape.
Tracing paper
For most of my linocuts i transfer the art to the lino using tracing paper. In this case the “lino” is a piece of bathroom flooring vinyl, and the woodgrain texture makes it quite hard to transfer a very definite line. Which leads to me making a mistake when going over the outline on the angle of the stroke termination at the bottom of the 4; later corrected just before cutting.
Cutting
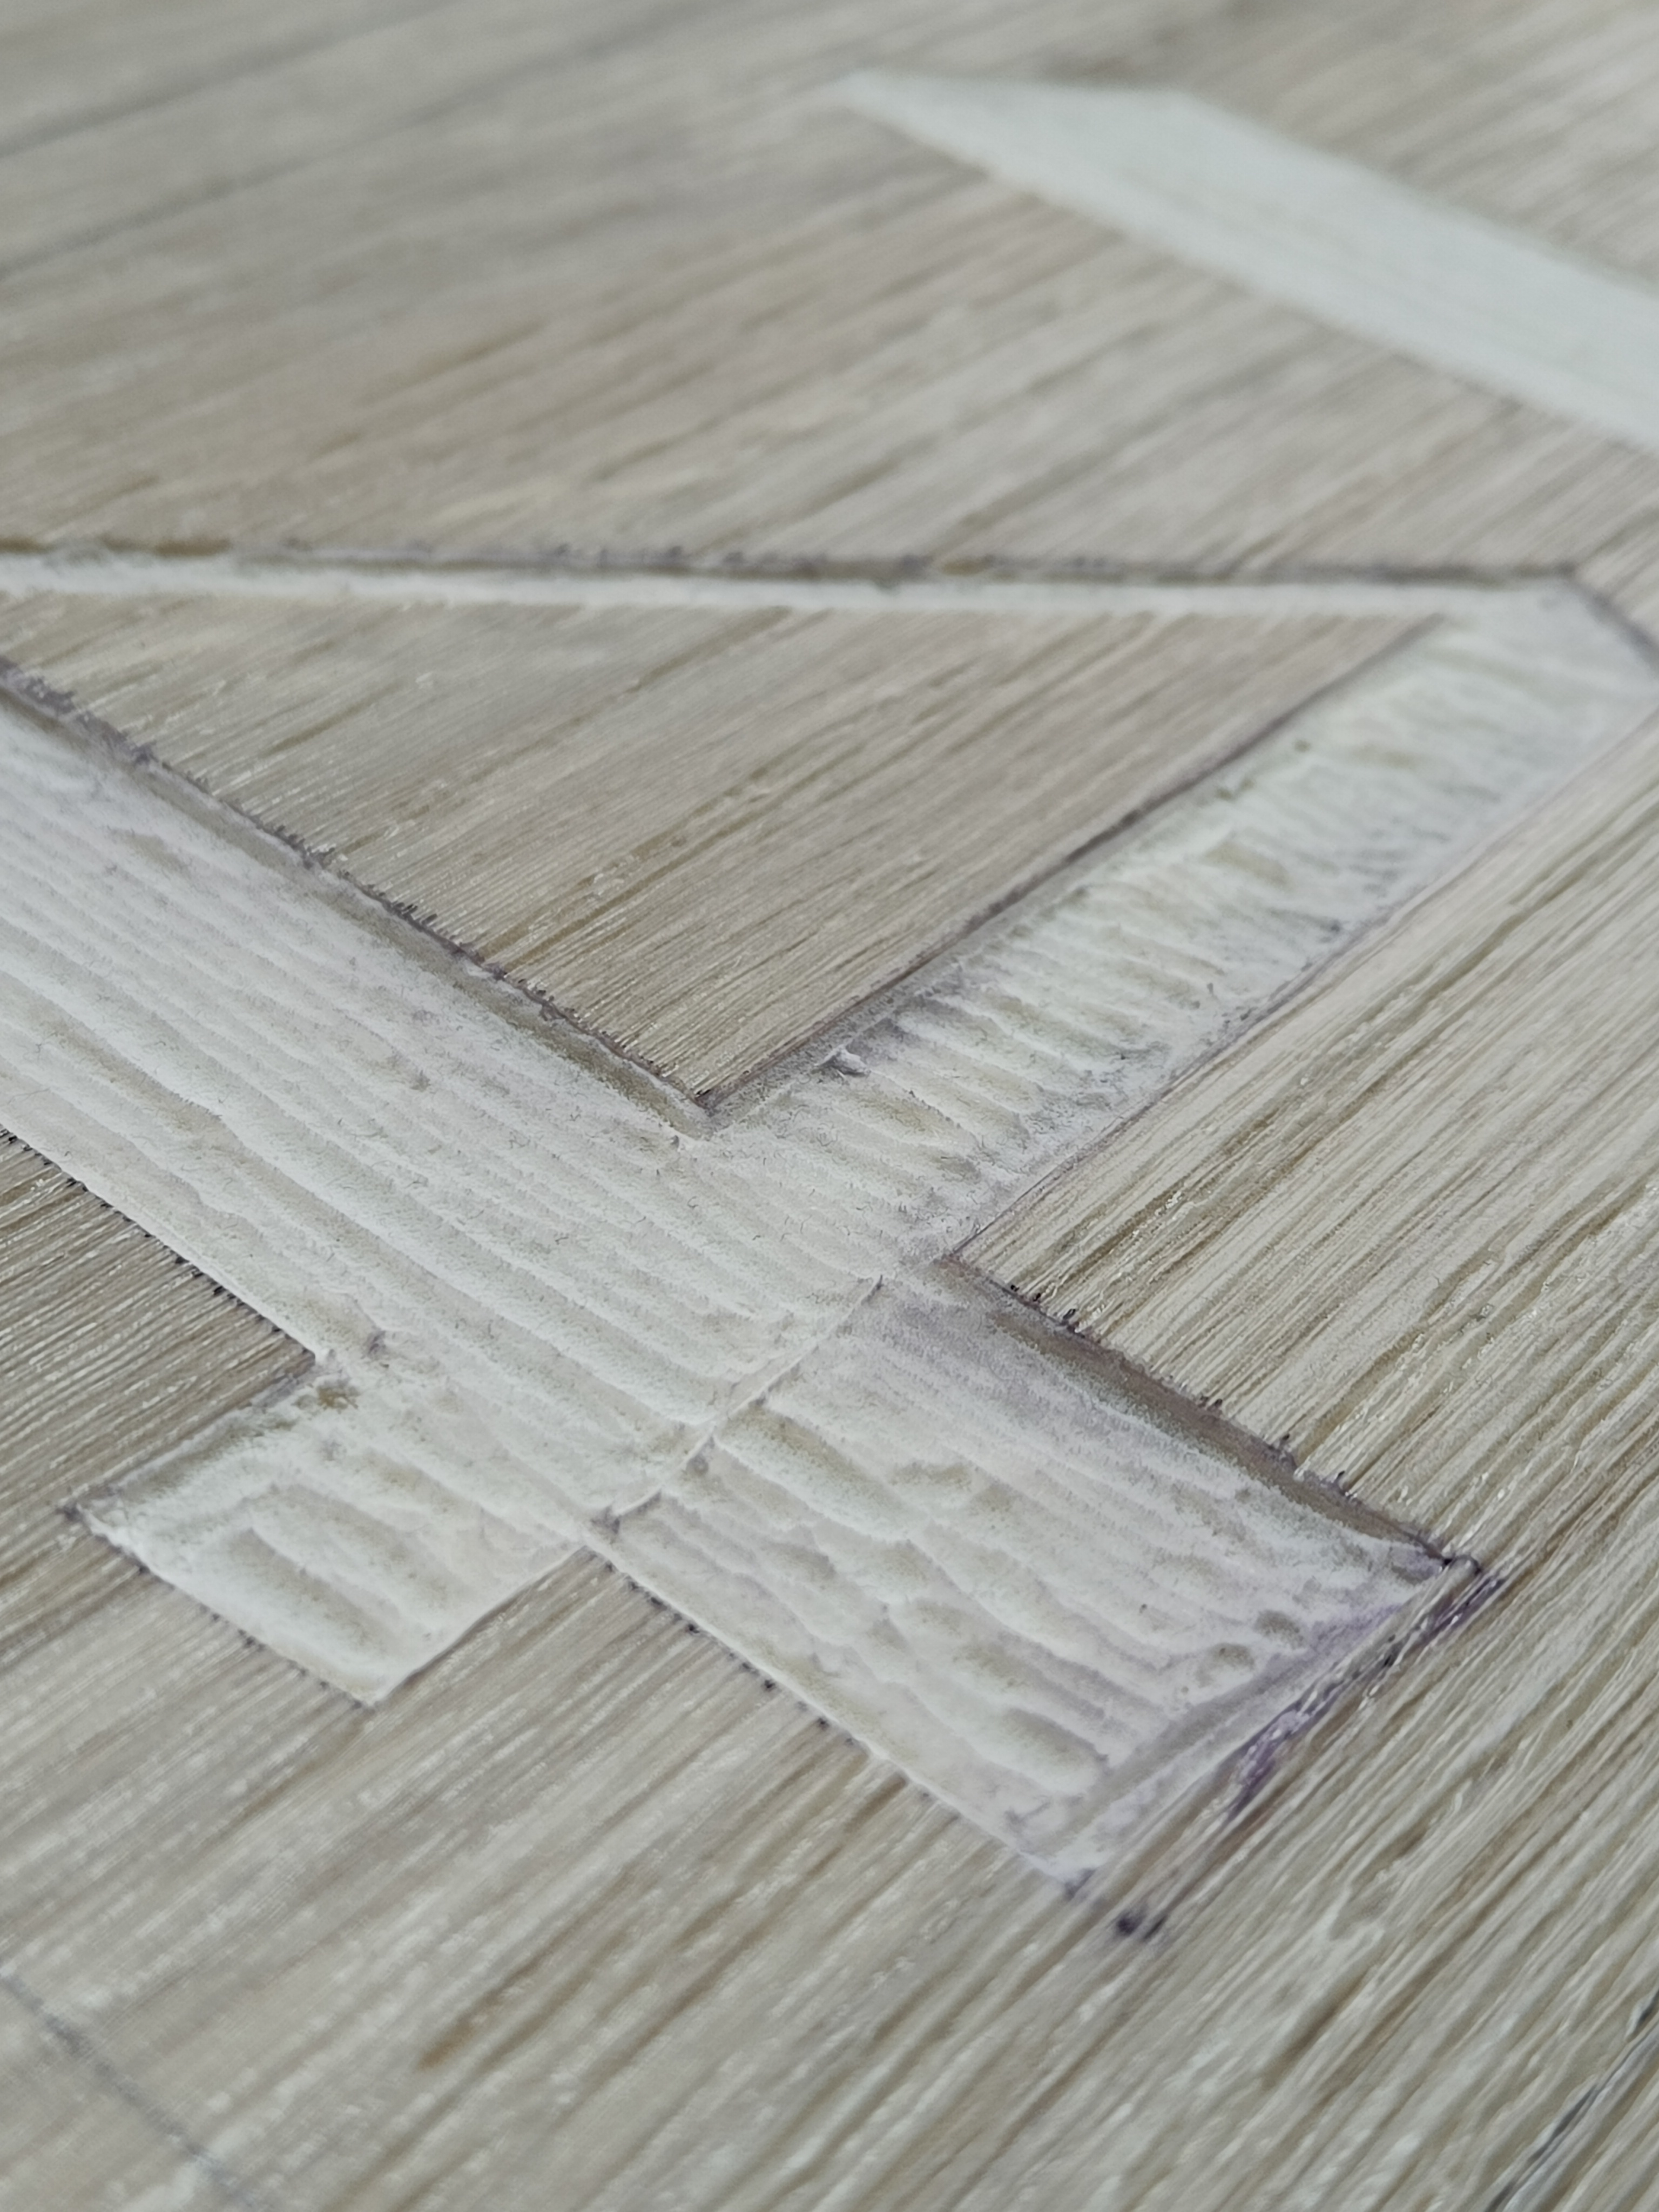
For a crisper edge and a more vertical slope i used the Maun Safety Ruler and a scalpel to make vertical cuts around the outline, before cutting the material out with the usual linocutting tools.
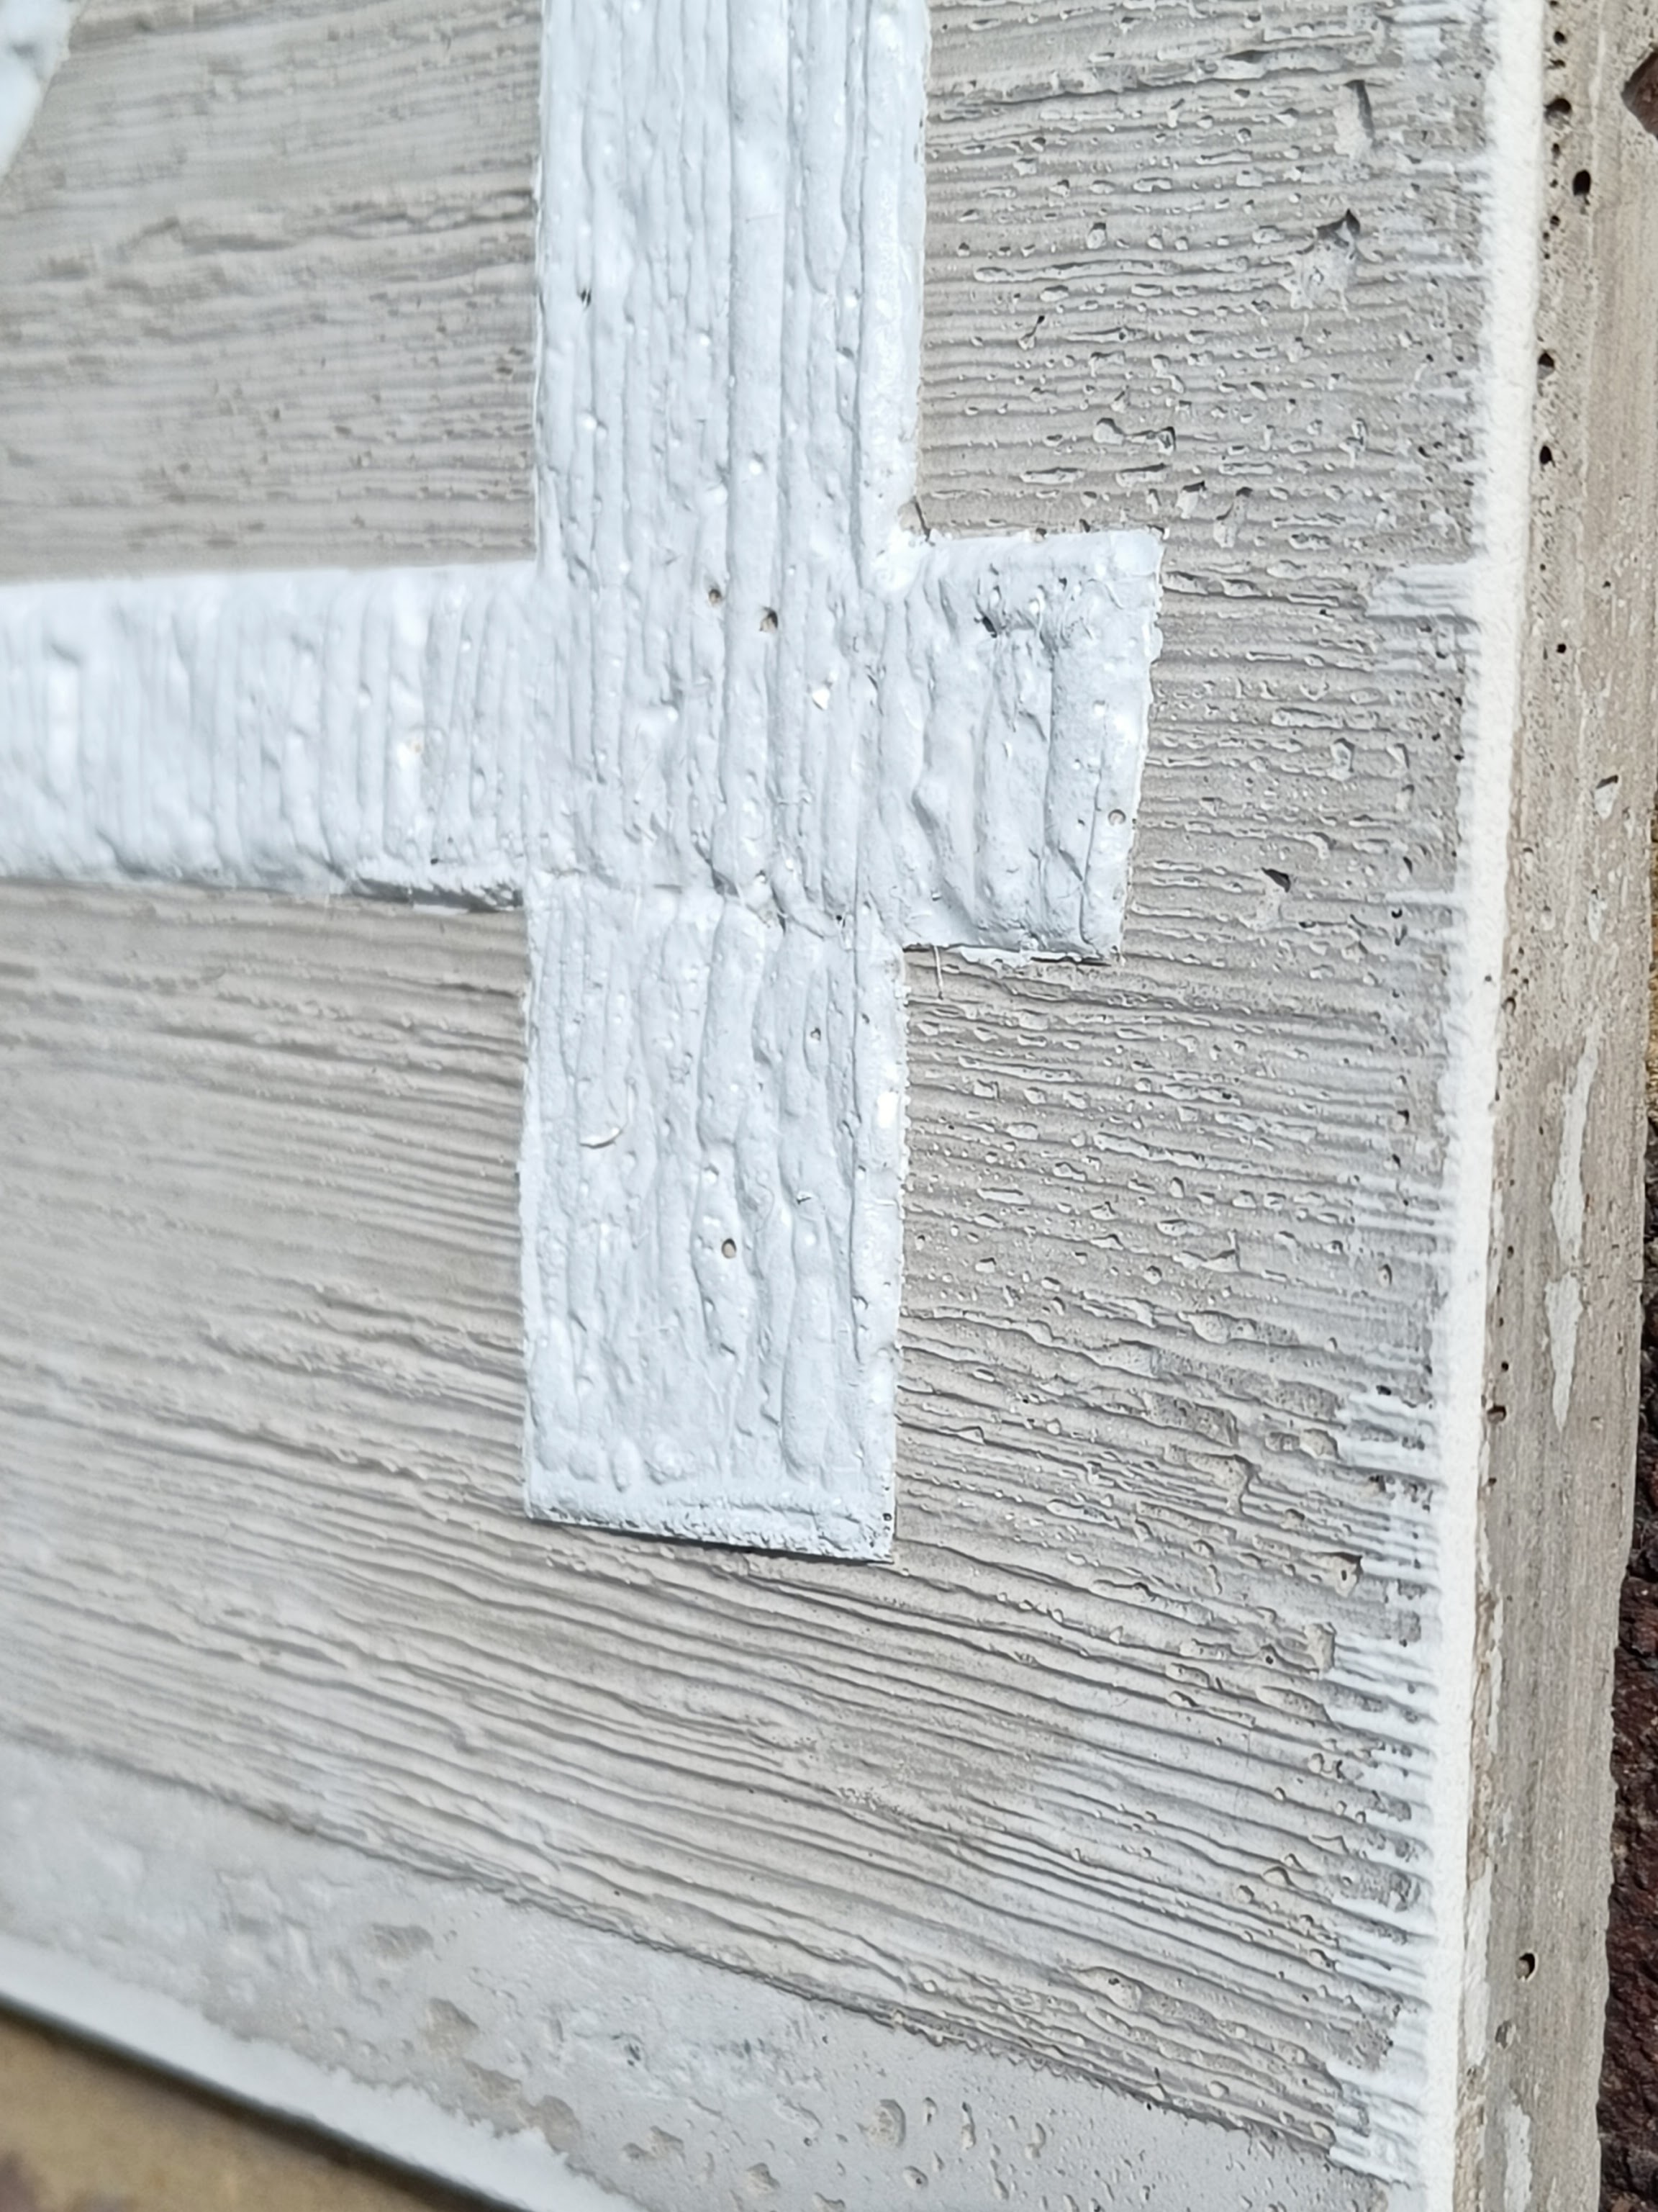
All my other linocuts were relief prints, where the figure is the uncut part. I was going to cast on this linocut so both the cut and uncut areas would leave an impression on the cast. The cuts i made in the lino make a very shallow trench which appears in relief in the cast. So, unlike a regular linocut where the cuts themselves don’t matter much (sometimes they leave a chatter on the final print), here every cut would appear on the cast.
I used the cuts to add a second oriented texture to the cast. The bathroom vinyl already has a horizontal woodgrain texture; i made mostly vertical cuts to cross that with a vertical texture on the relief.
Framing
I used various bits of spare cardboard to decide the dimensions of the frame which would become the size of the finished concrete panel. Then off to the new (pre-loved) chop saw to make the frame from spare wood.
On the lino i stuck two strips of Gorilla tape top and bottom which will create a smooth texture zone at the top and bottom as an additional decorative element.
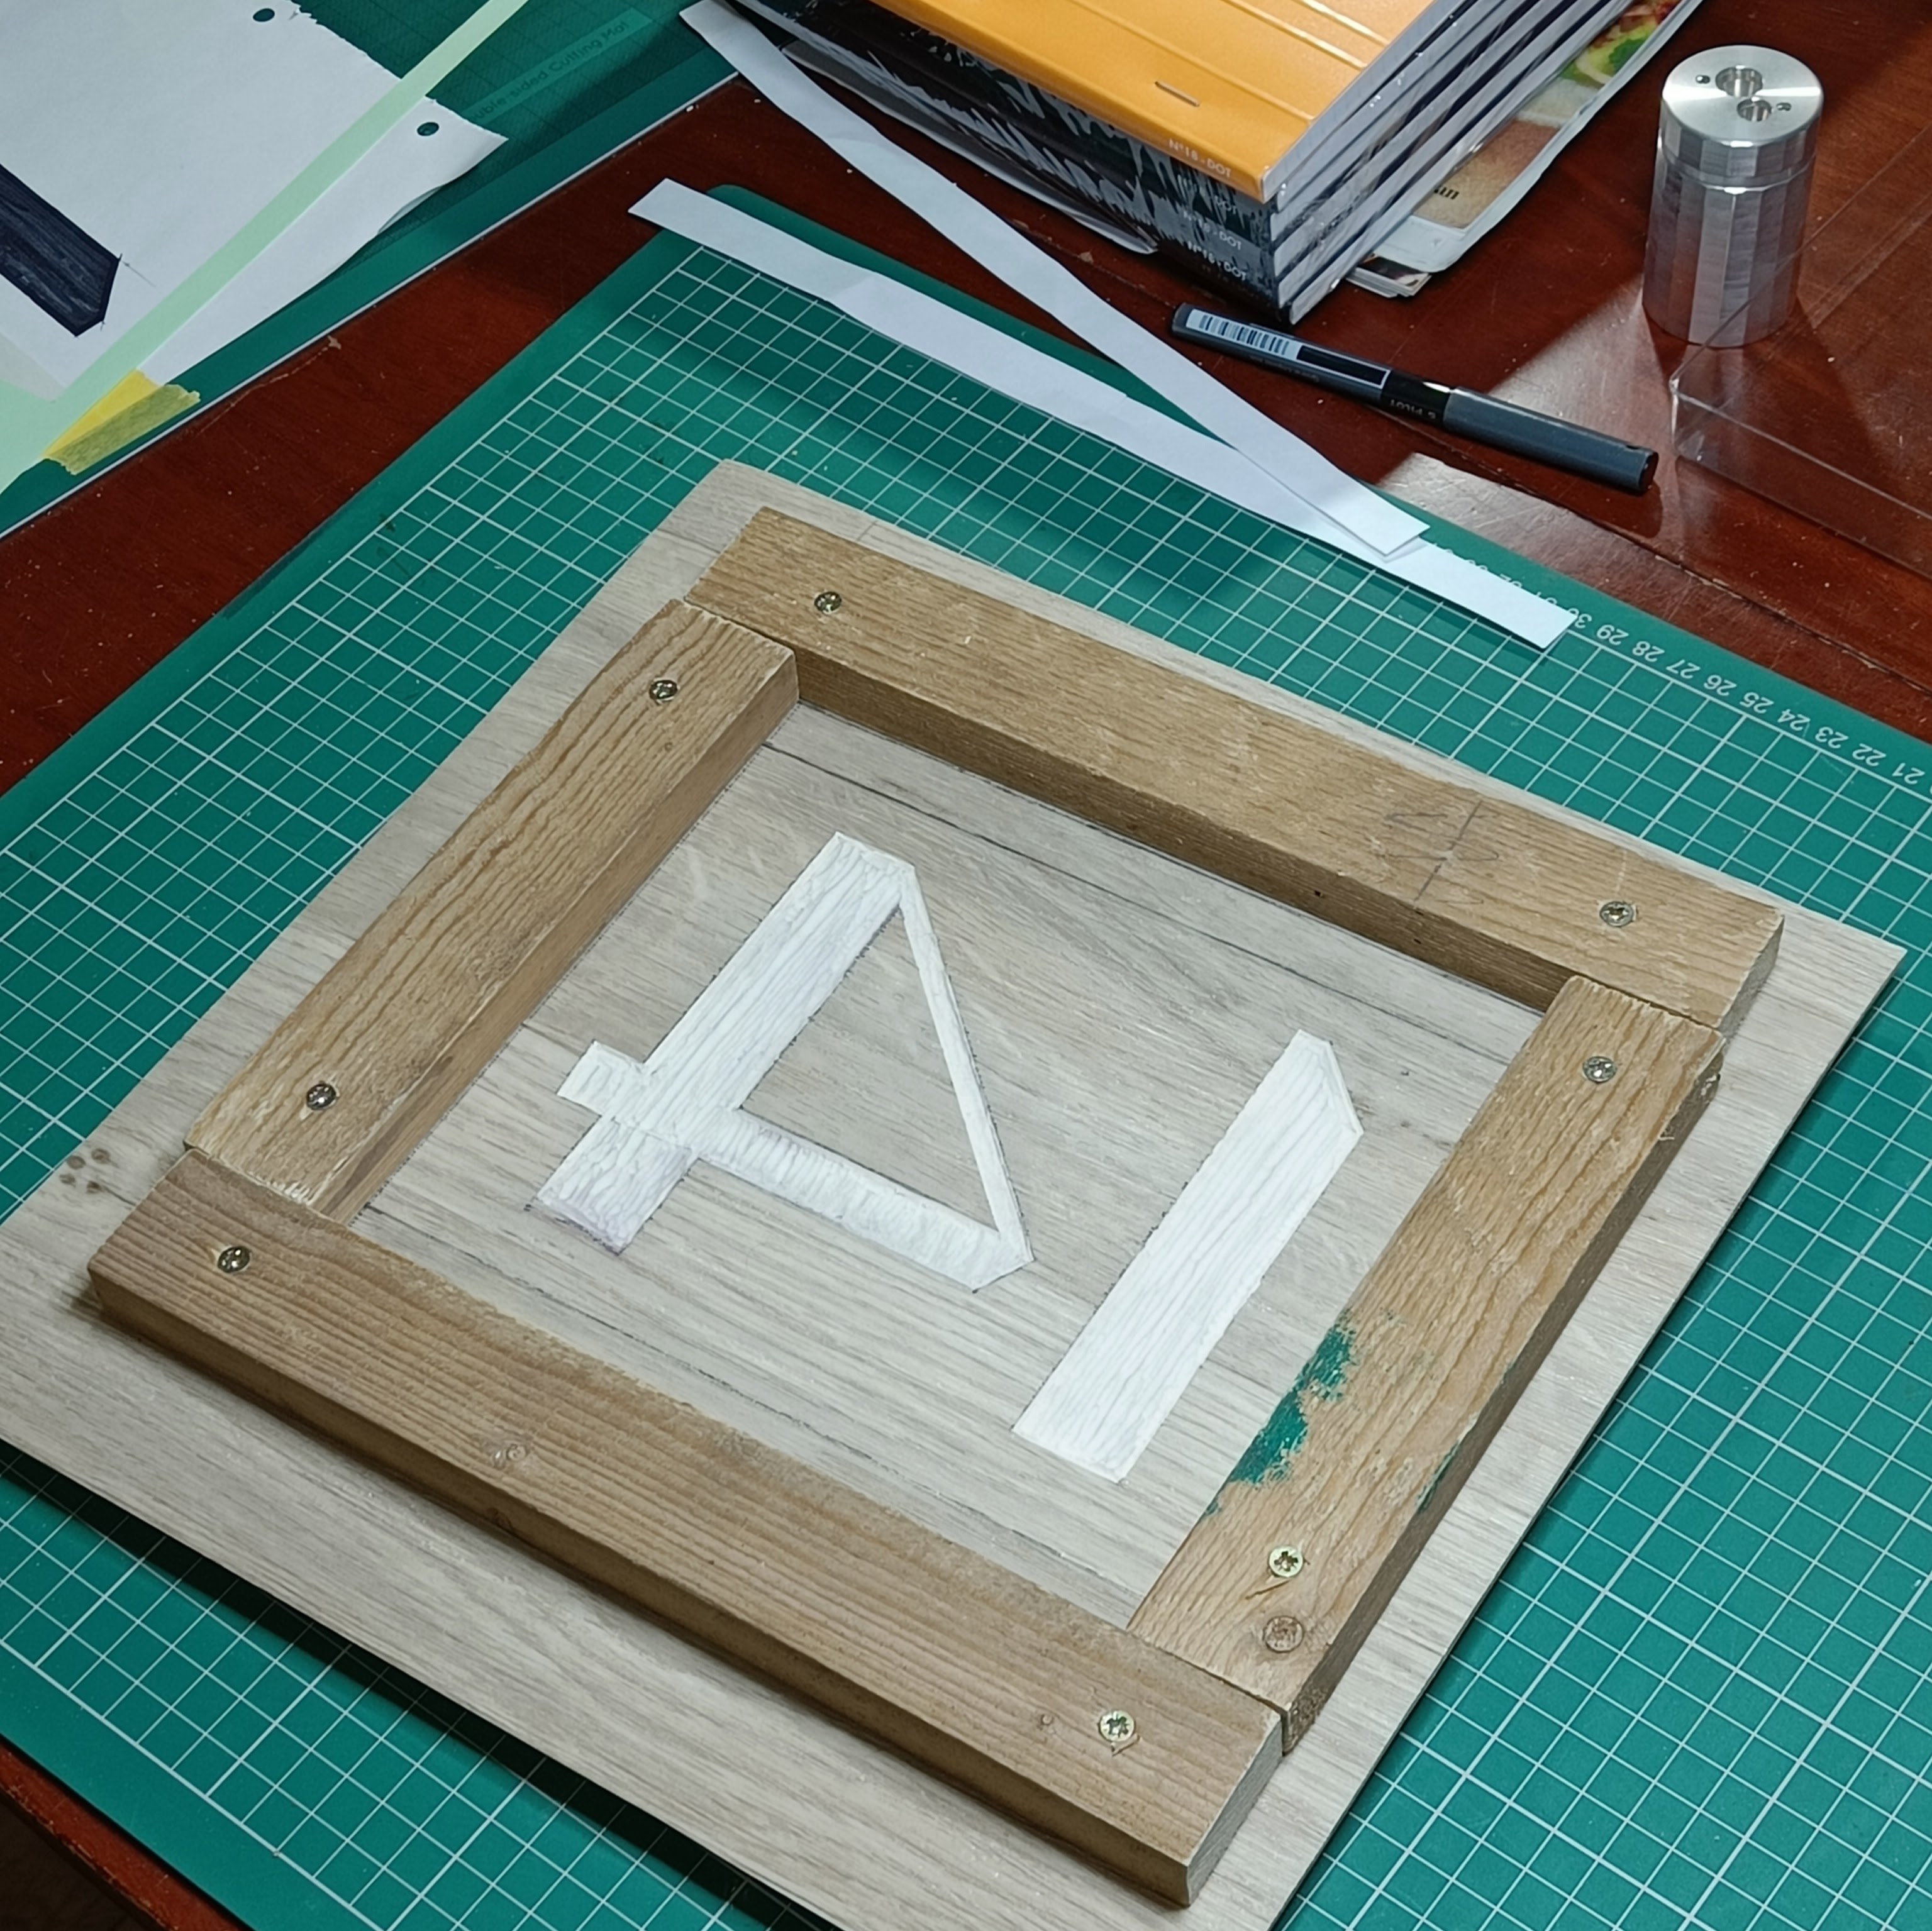
The pieces of the frame are screwed through the lino onto a piece of OSB at the back.
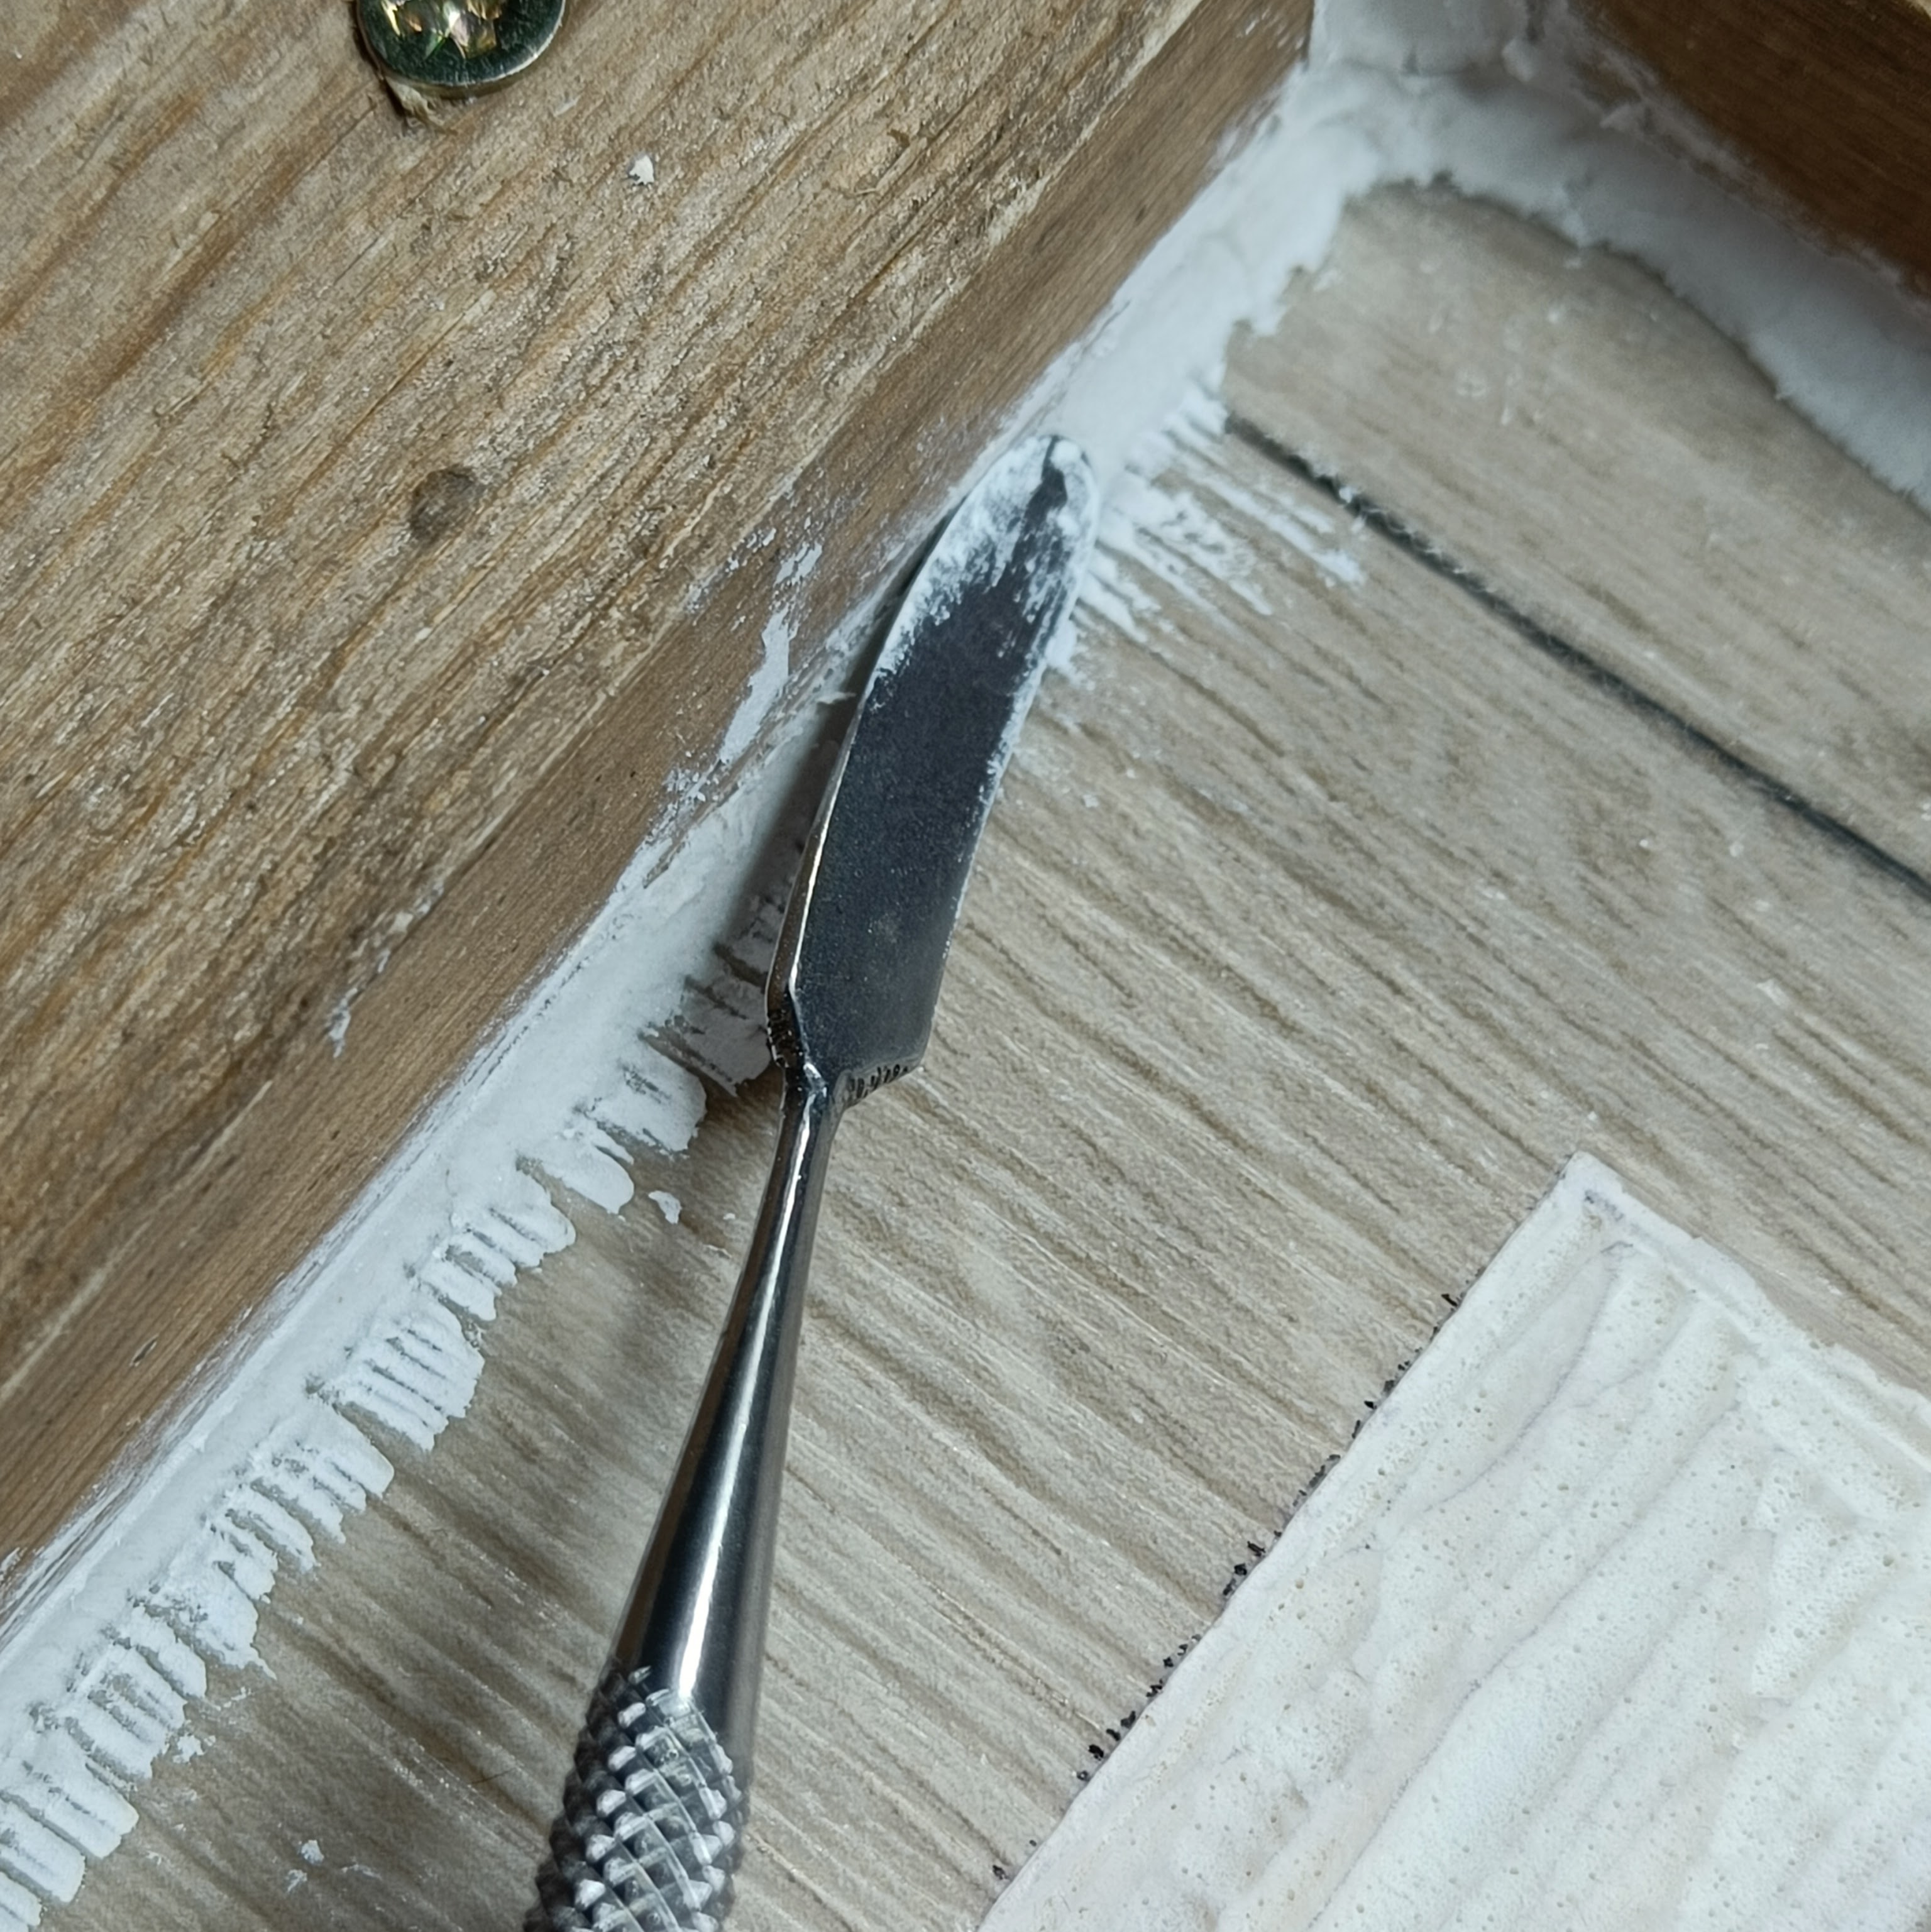
Filleting and painting
For the final design i wanted a rounded edge on the front of the concrete panel. I also didn’t want concrete to flash underneath the wooden frame so i made a fillet with DAS modelling clay. I found this step quite annoying, possibly because it was my first modelling clay project (and it wasn’t entirely succesful, continue reading).
The whole thing i then painted with liquid vaseline which was quite expensive and not obviously any better than a spare can of silicone lubricant that i used on subsequent concrete castings.
Mixing and Casting
I am not at all familiar with mixing and casting so there was much guesswork here, guided by a comment on the side of the tub. The concrete i used was a dry premix specifically sold for art. Apparently with appropriate fine aggregates (sand), binders (fibre glass, i think), and plasticisers (probably). It’s quite expensive.
The premix is sold by weight, but i needed a specific volume. I used a final density of 2.4 kg/L for a rough estimate. I needed a volume of about 0.250 L suggesting around 500g of concrete required. In the end i think i added a little more concrete and a little more water, and kept very few notes about how much of each i was adding.
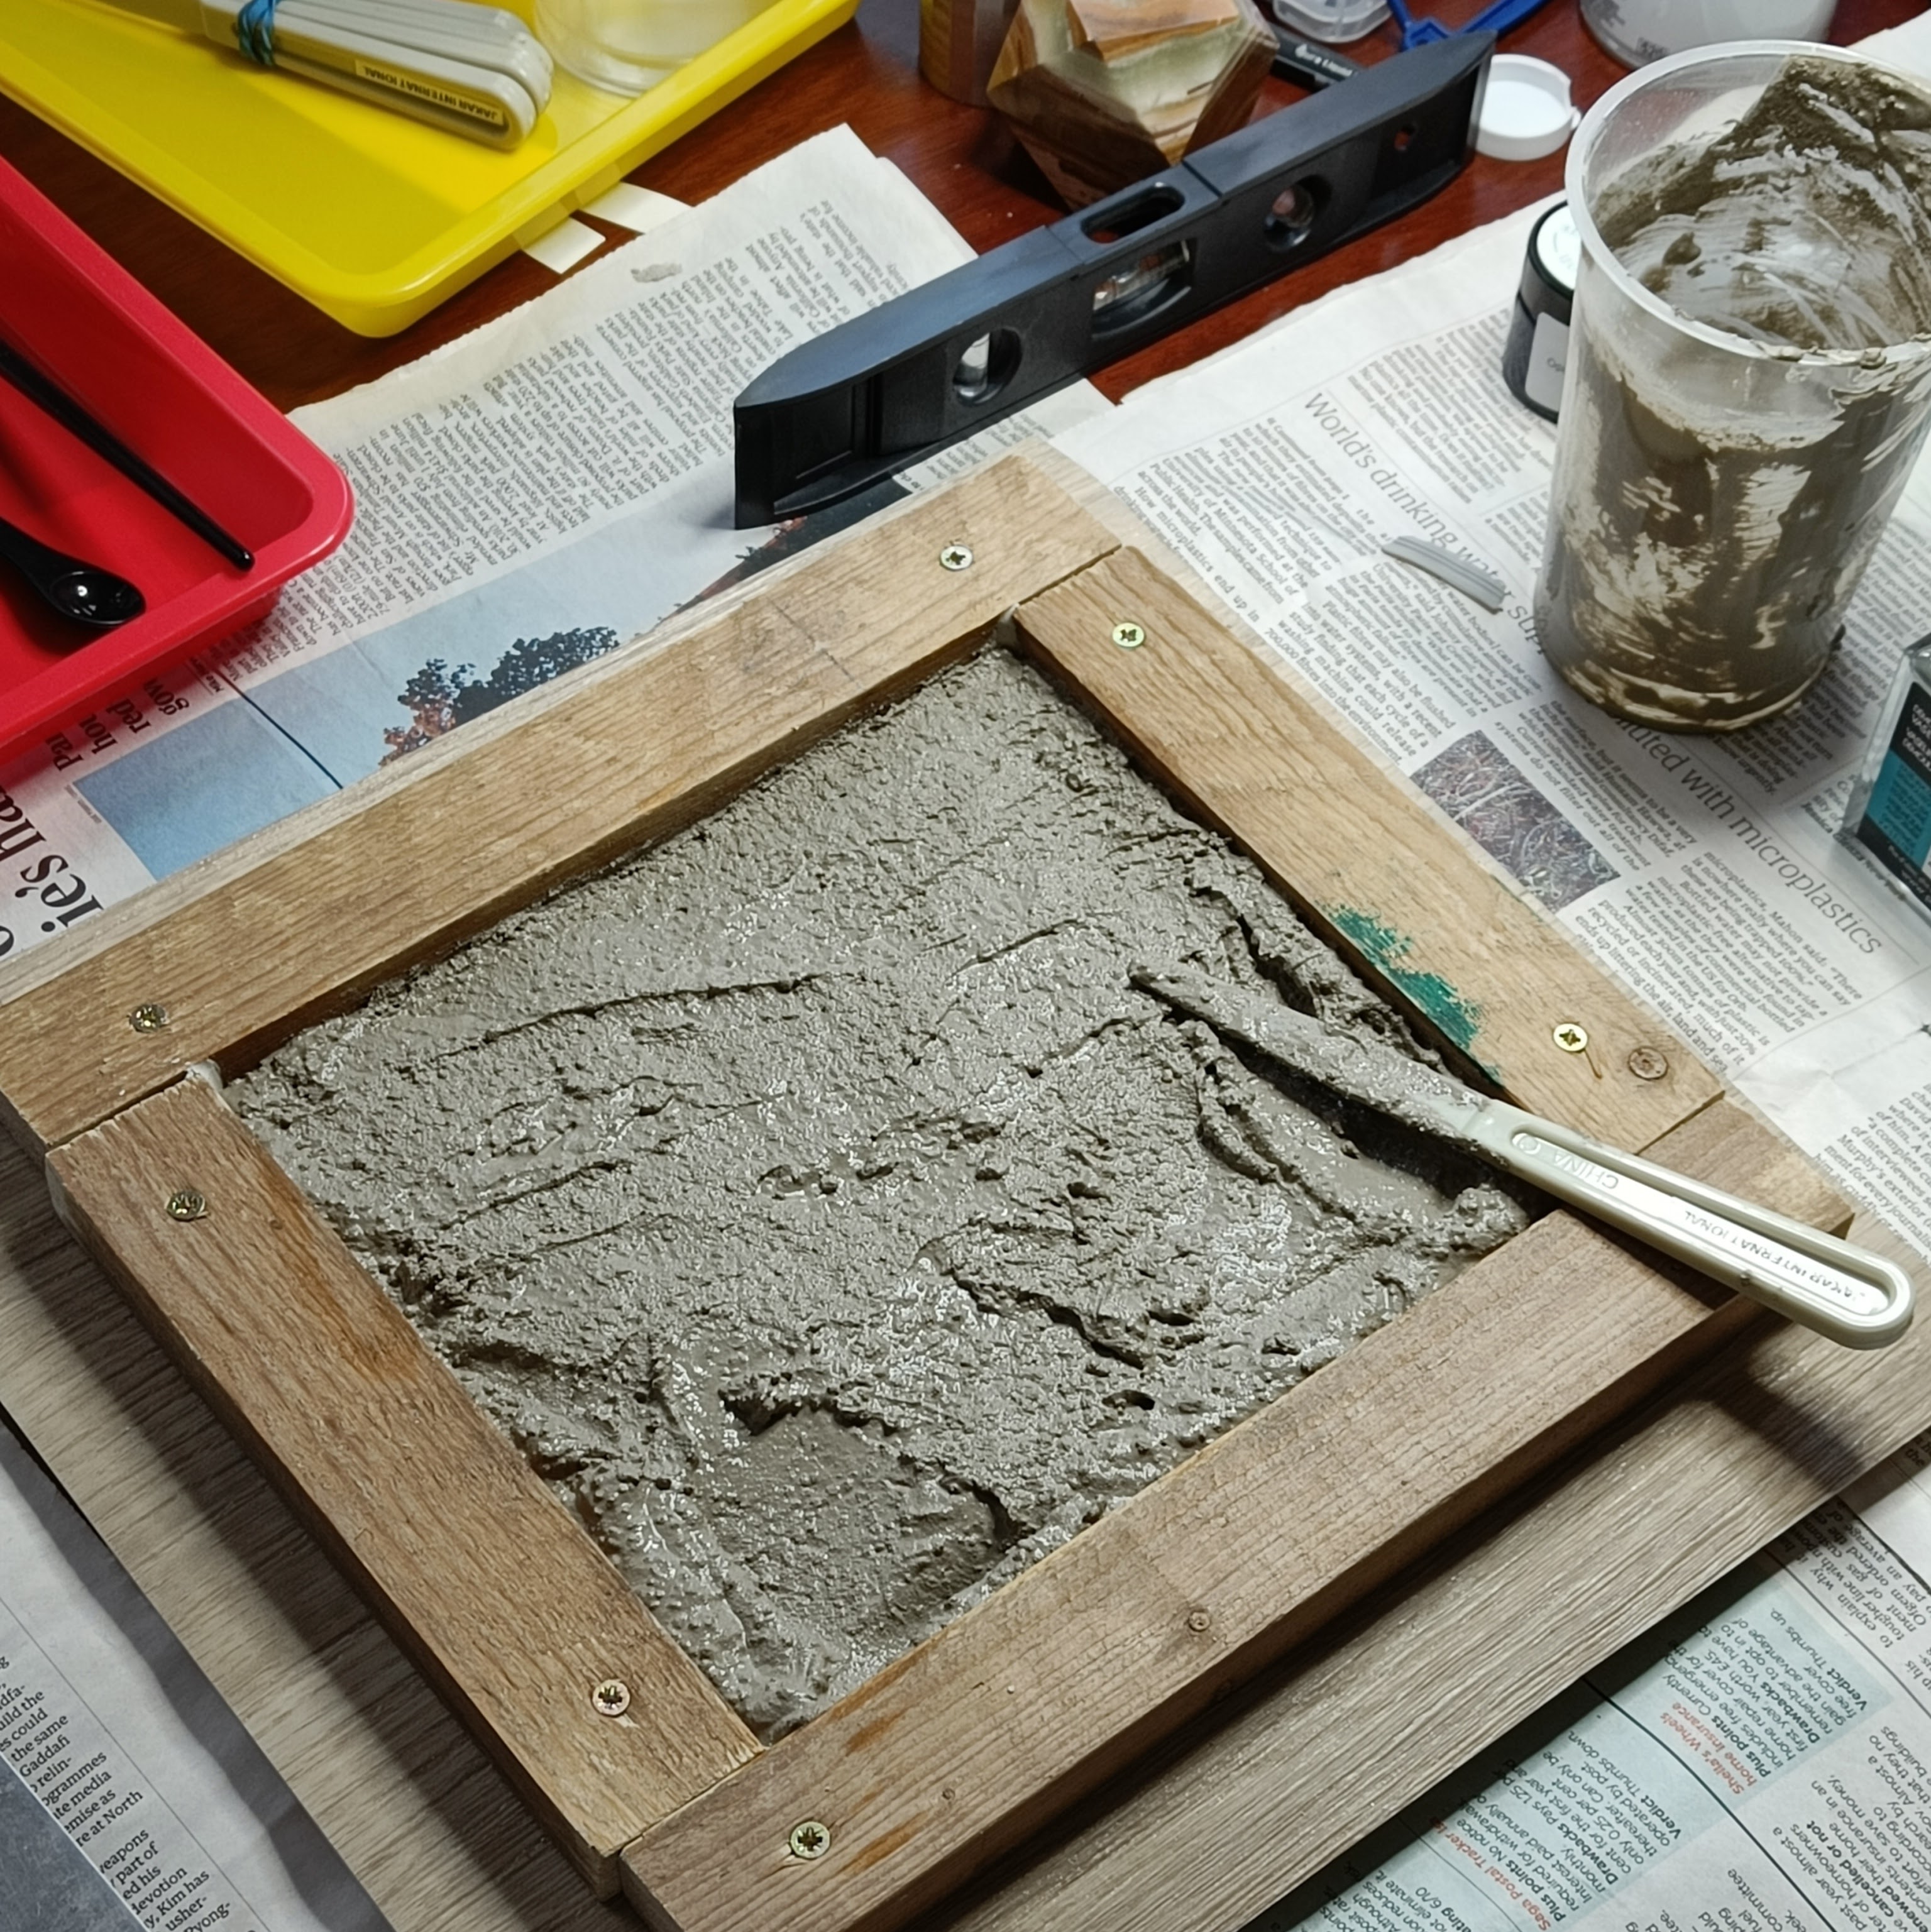
Pouring the wet concrete in was quite stressful and resulted in a big lumpy mess. But then, some magic. Applying the mouse sander to the side of the frame to vibrate it suddenly settles the concrete into a mostly flat surface with that wet sheen you see in professional pours. Air bubbles were coming up, a lot of air bubbles, so i kept vibrating from all sides of the frame. For much longer than i had expected i would need, and there are still small bubbles in the final piece.
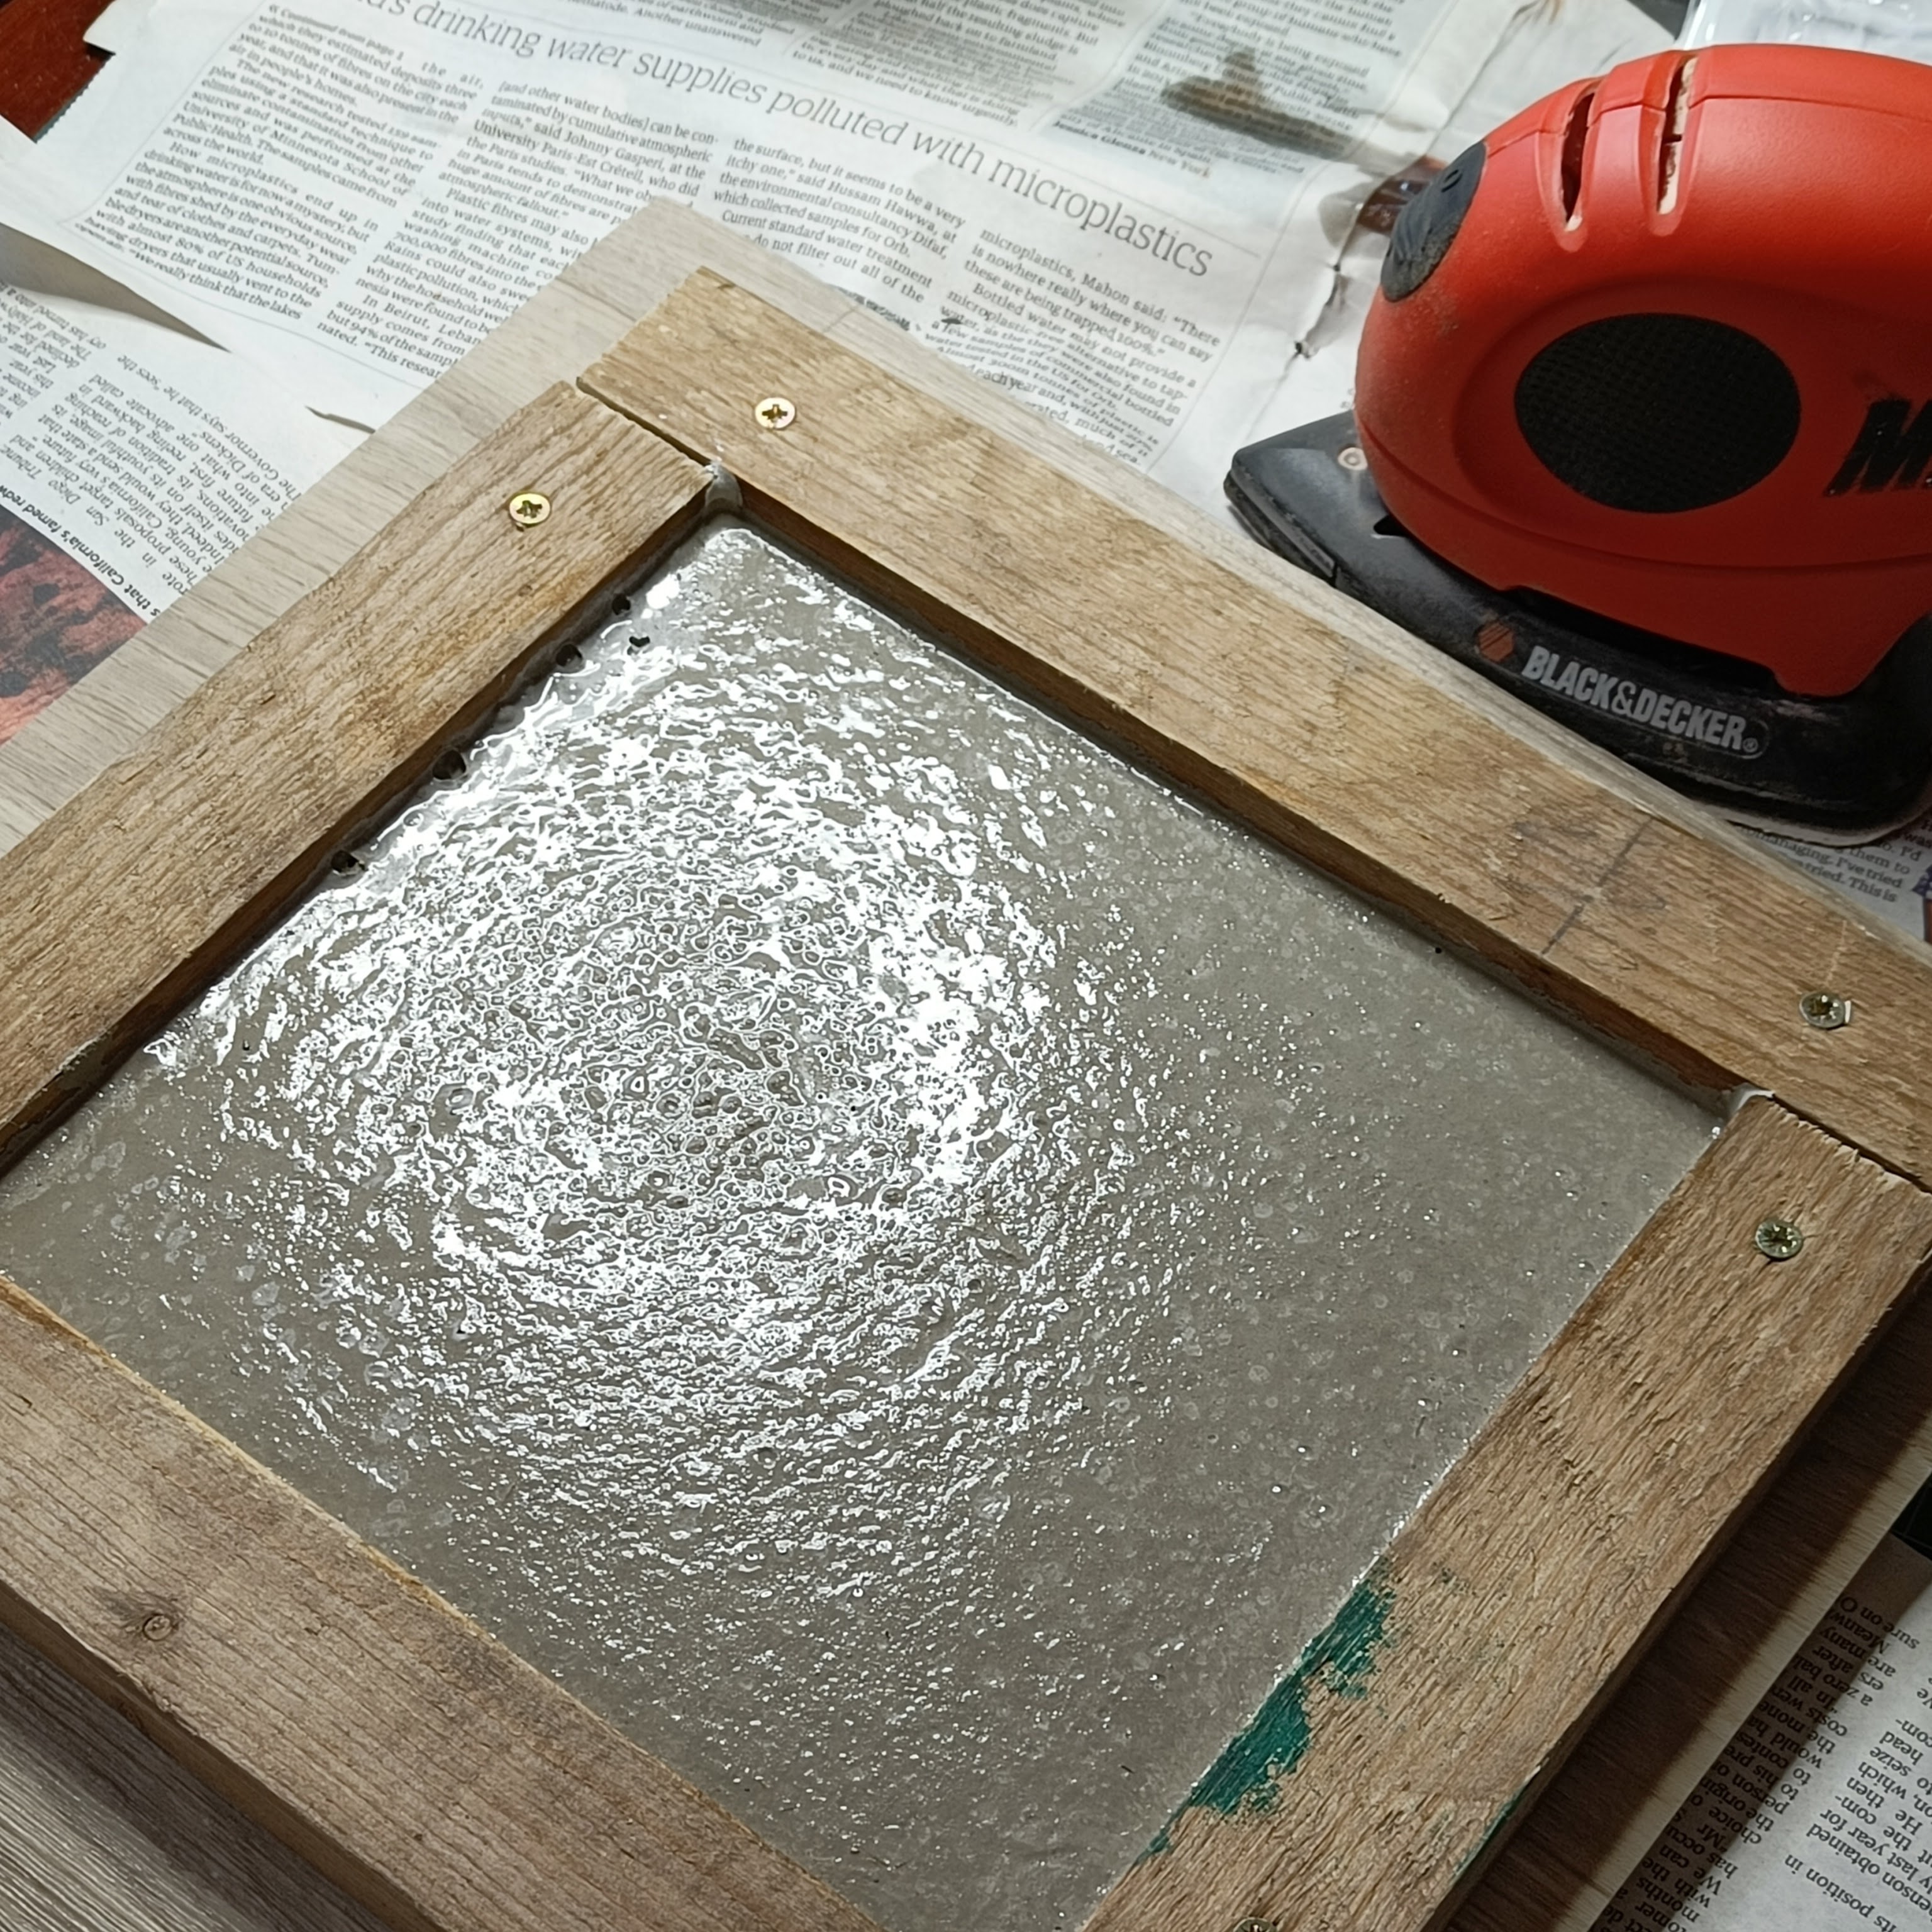
I think larger works would definitely need some more work put into the vibration stage, maybe with purpose built vibration tables or bullet vibrators like the professionals use.
Curing takes “1 to 3 hours” and looked like it would have been fine to pop it out of the frame after 3 hours, but in fact i waited 24.
Breaking the Frame
There were no problems separating the casting from the disassembled frame (yay for vaseline), but it was now clear that the concrete had bonded with the modelling clay, instead of separating from it. Not ideal.
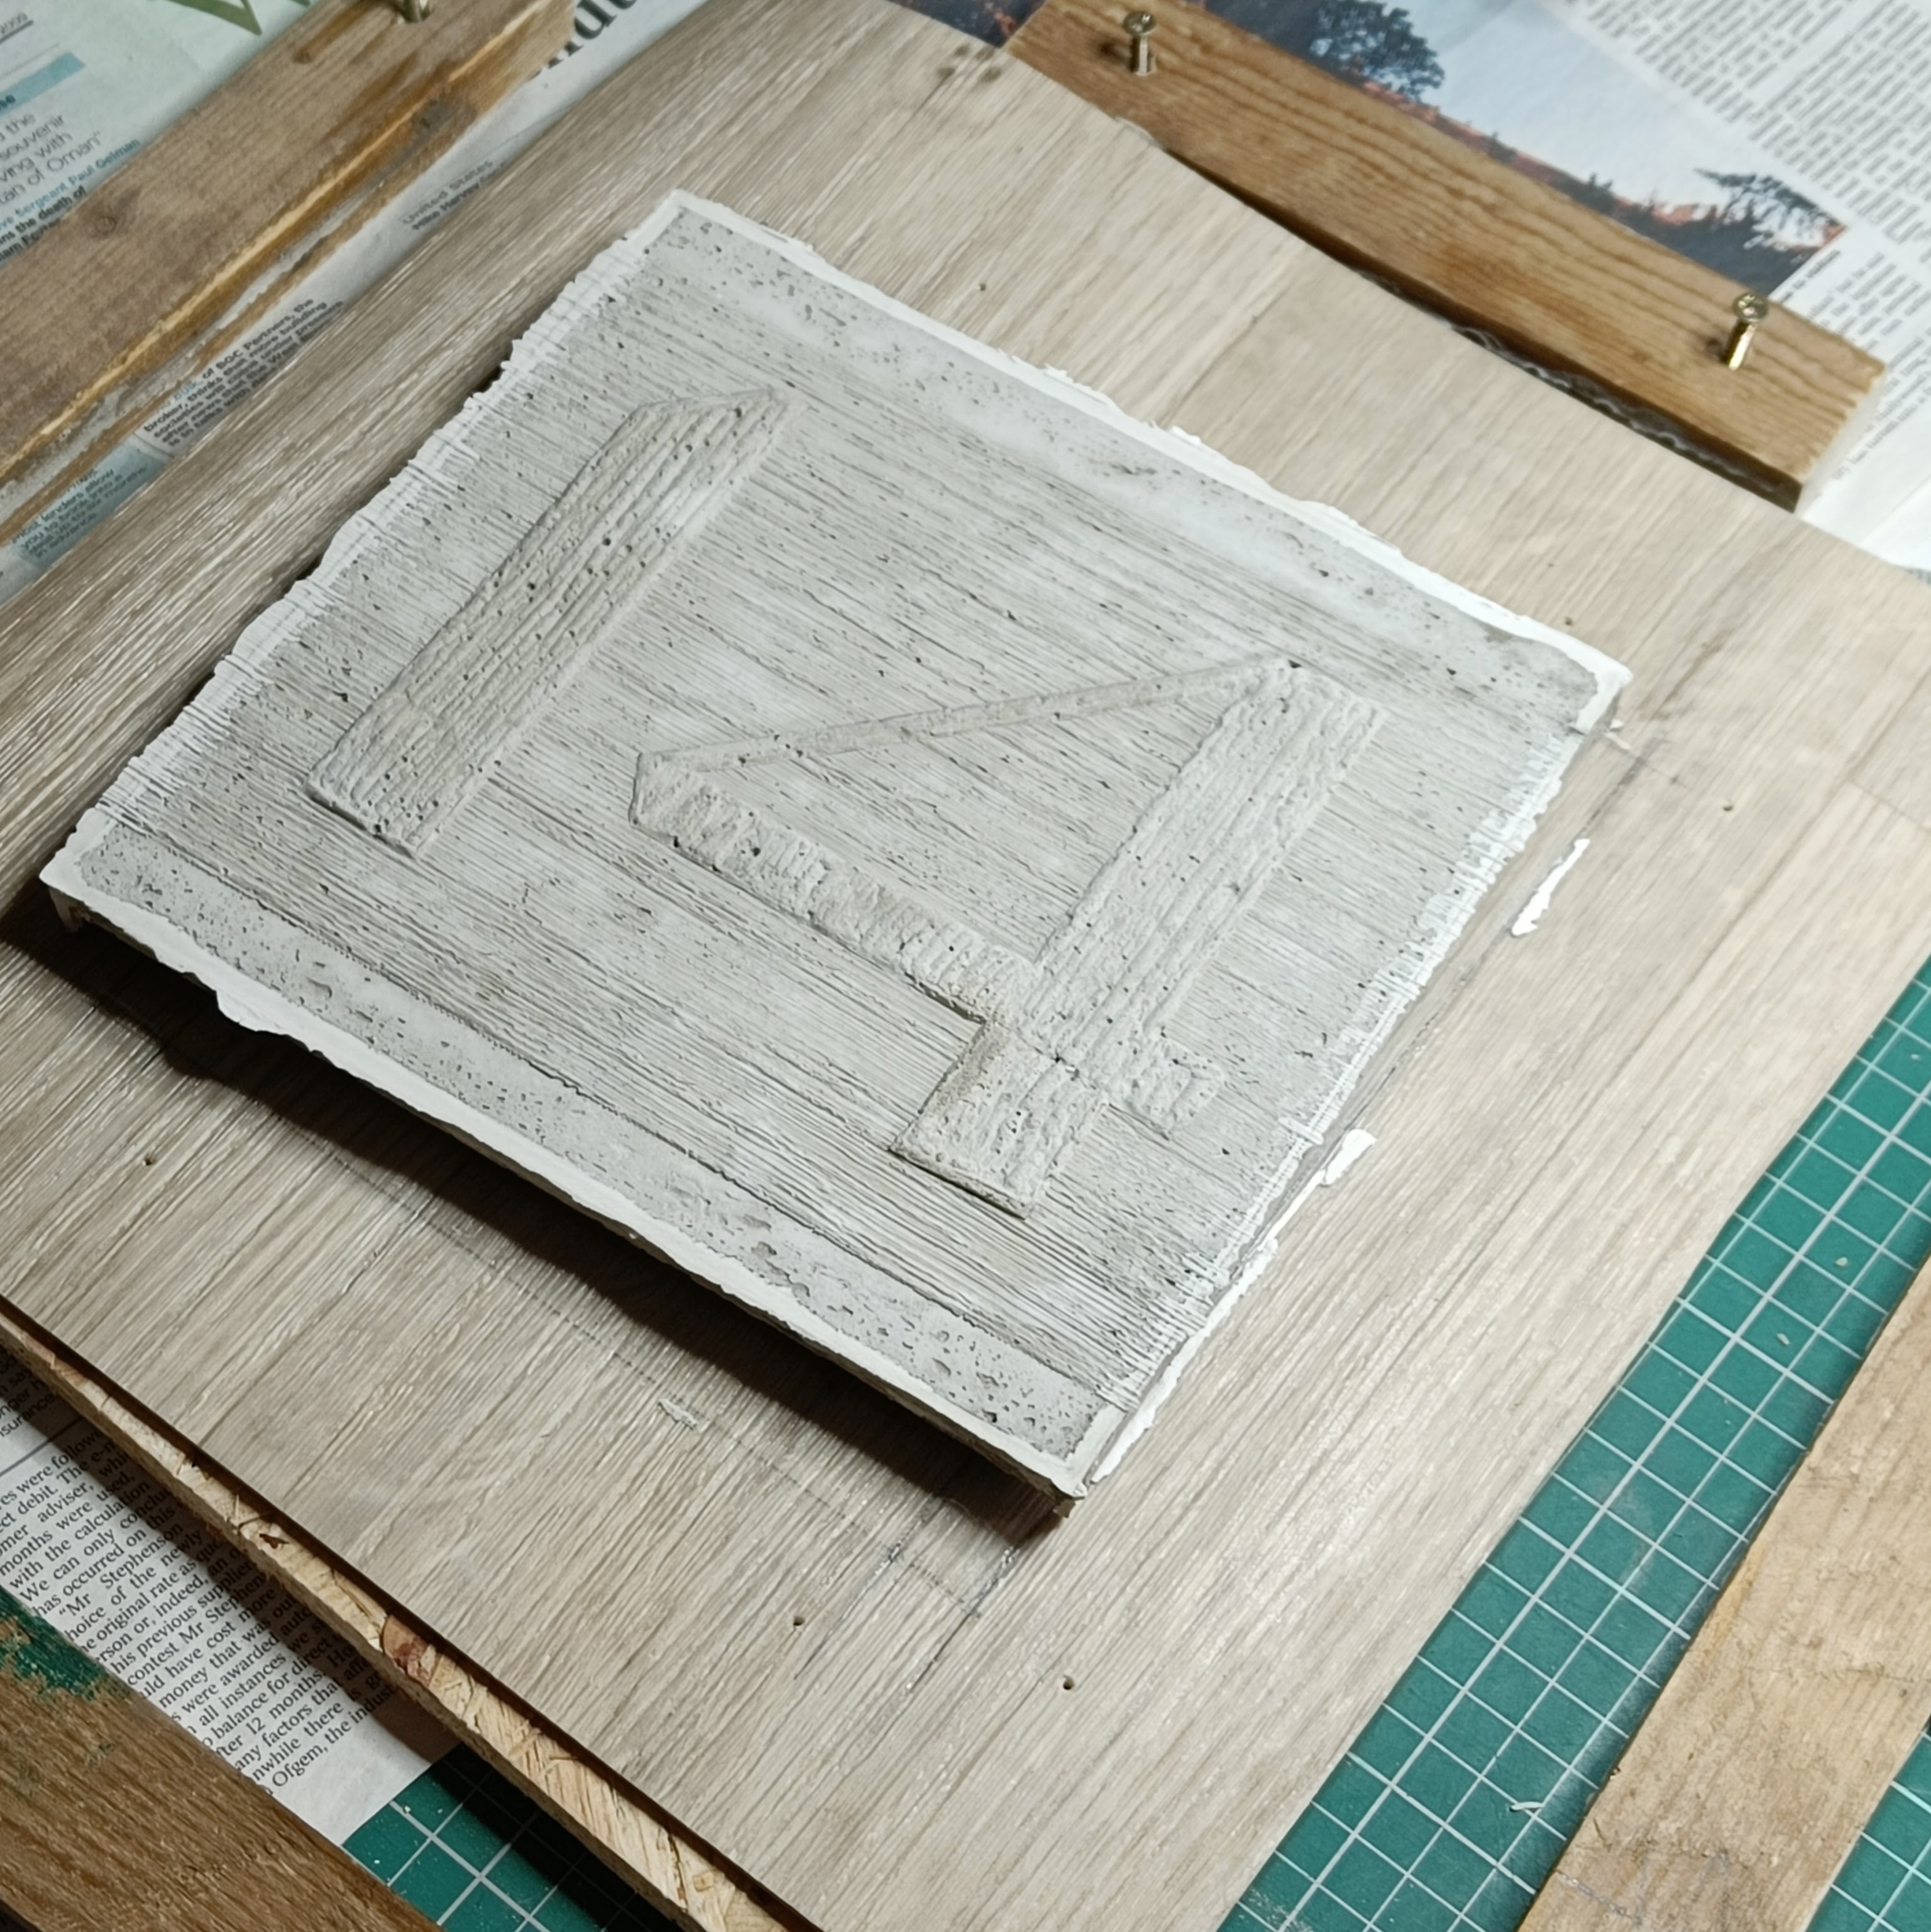
I filed away all the rough edges and flashing and eased the modelling clay edges. Aesthetically i don’t mind the modelling clay forming a white trim around the edge even though it’s not intended. But the modelling clay isn’t supposed to be weatherproof, so we’ll have to see if it weathers away in the outside exposure.
Also clear at this stage is that the relief is very small, and the grey-on-grey doesn’t provide enough contrast. Originally wasn’t sure if i was gonna paint, but now i’m gonna paint.
Found the Barretine under the stairs and cleaned the front of the plaque with it.
Frogtape
It’s not clear how to paint concrete and the advice you find on the web is mostly about painting industrial concrete floors. So i try some plausible options on a second smaller cast object for paint trials (from half a shampoo bottle, it casts very nicely).
Humbrol enamel is better than Hammerite.
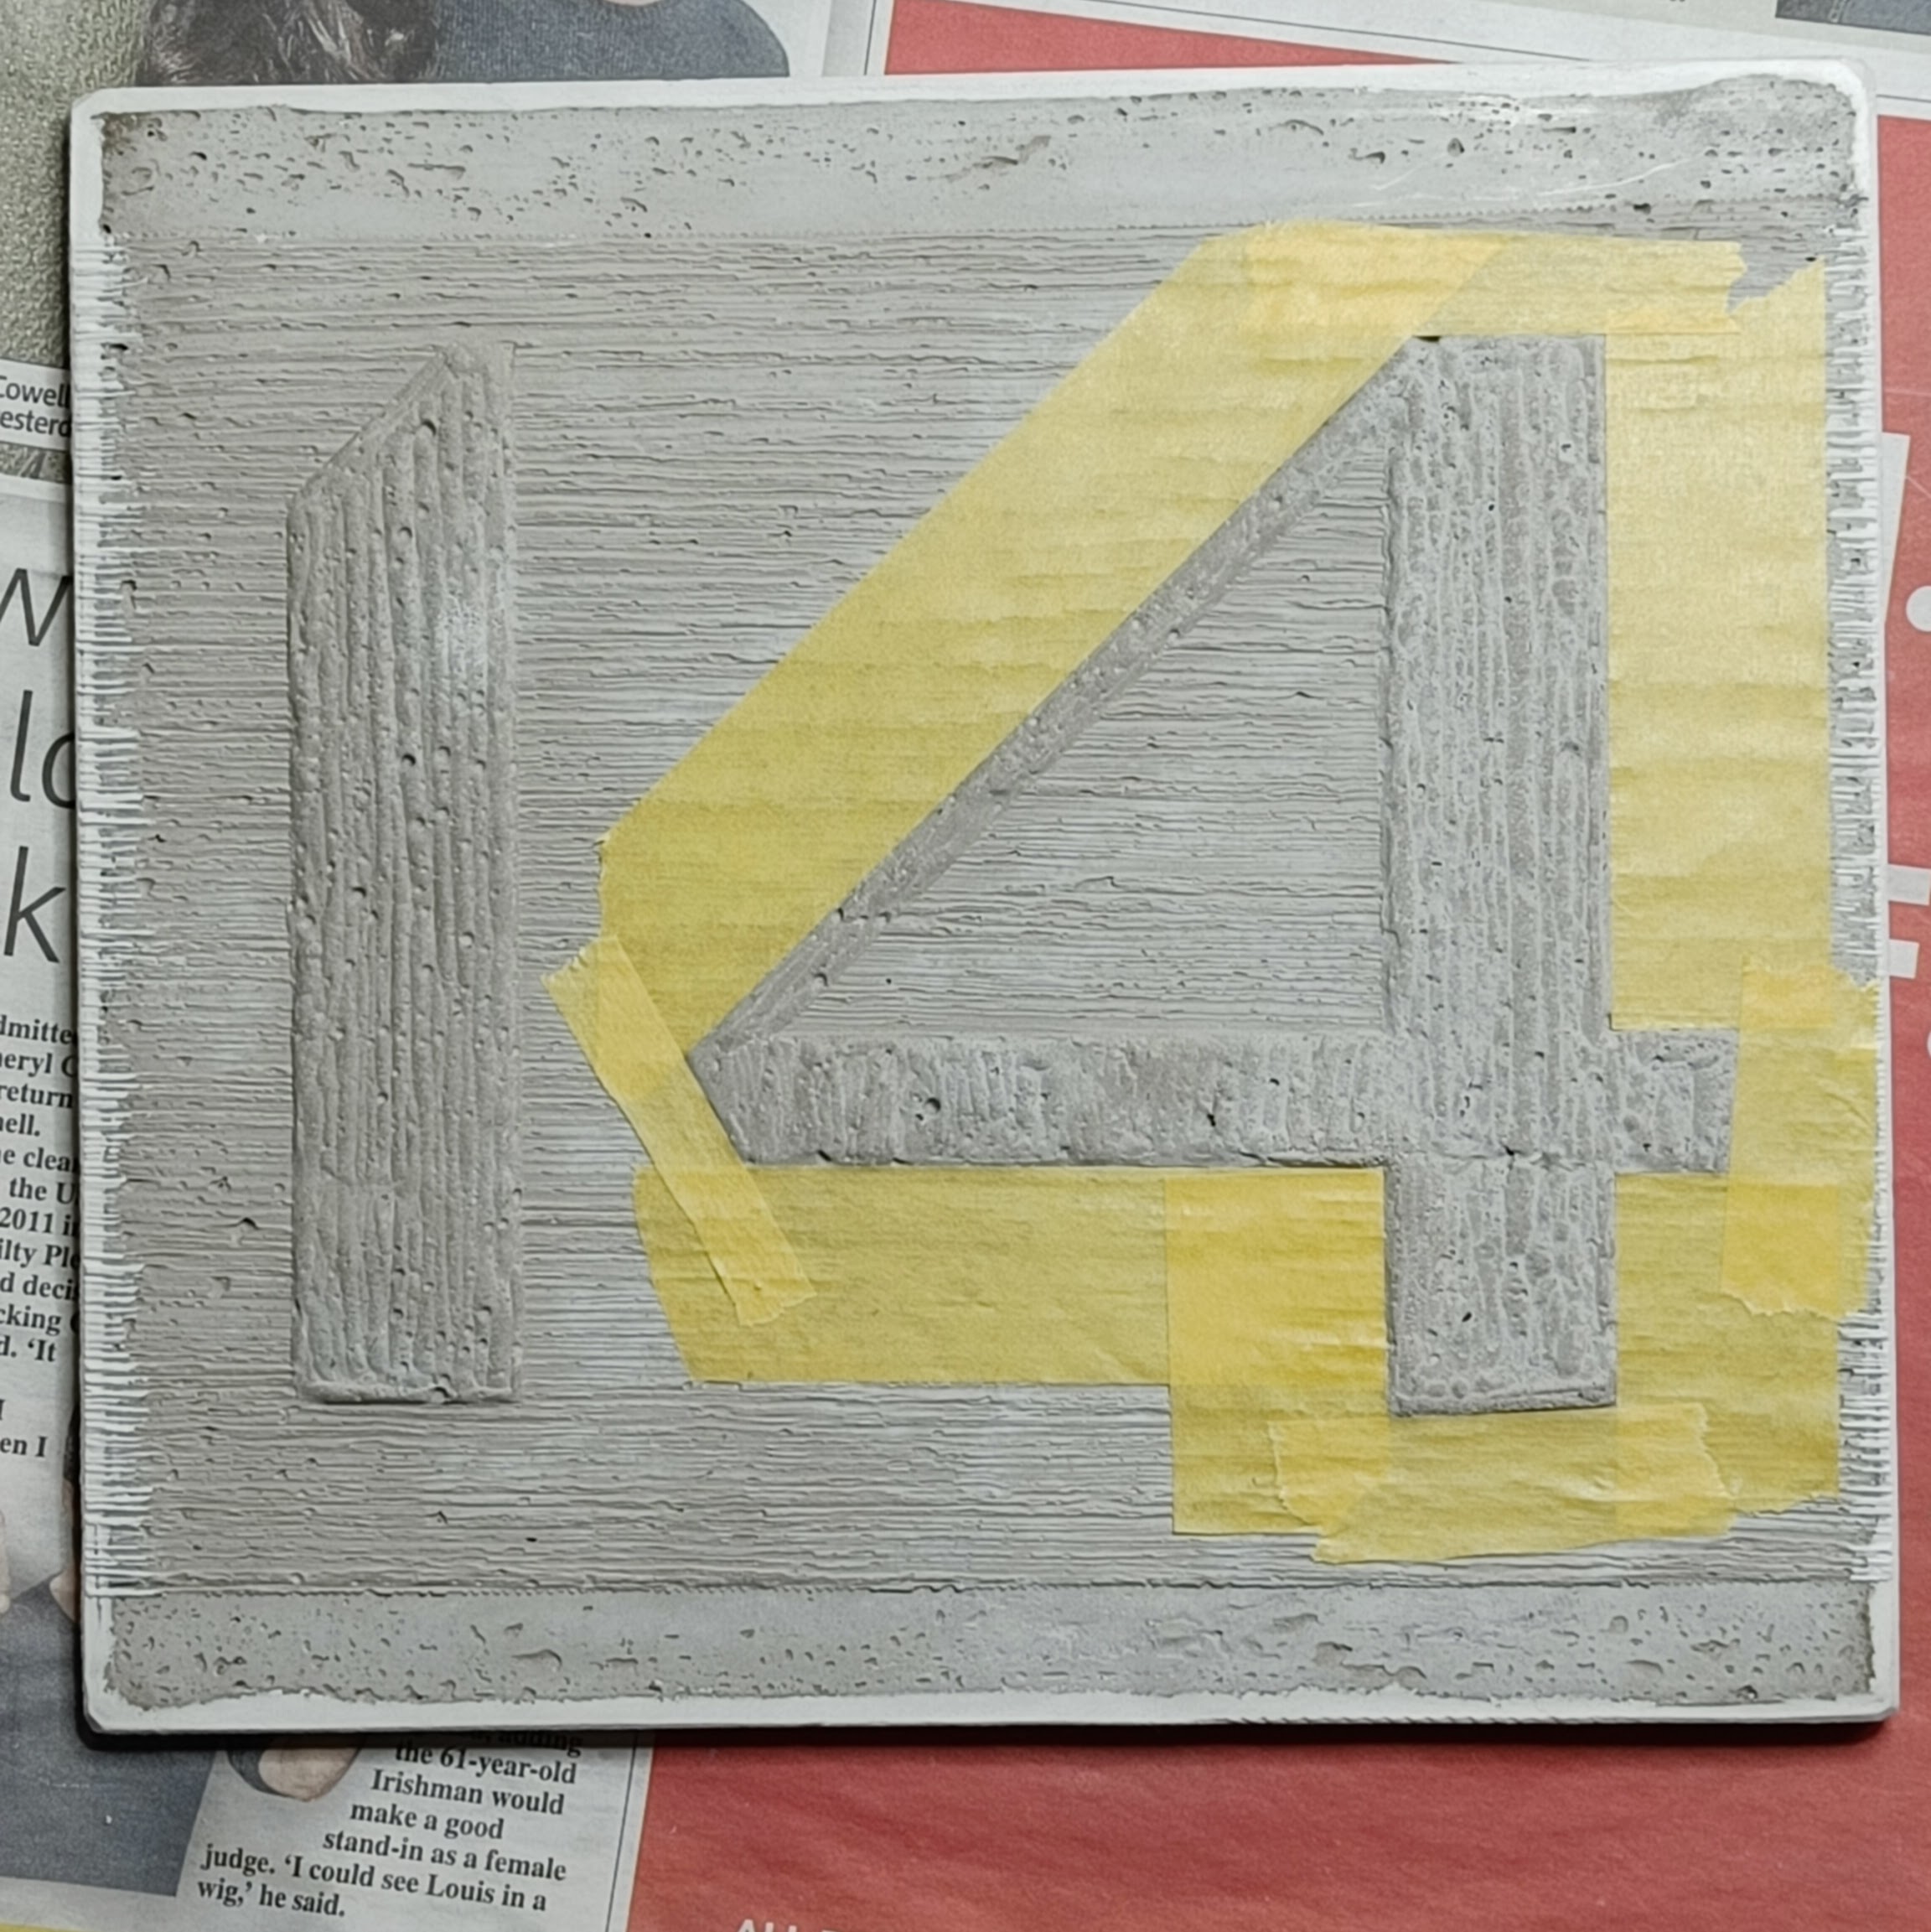
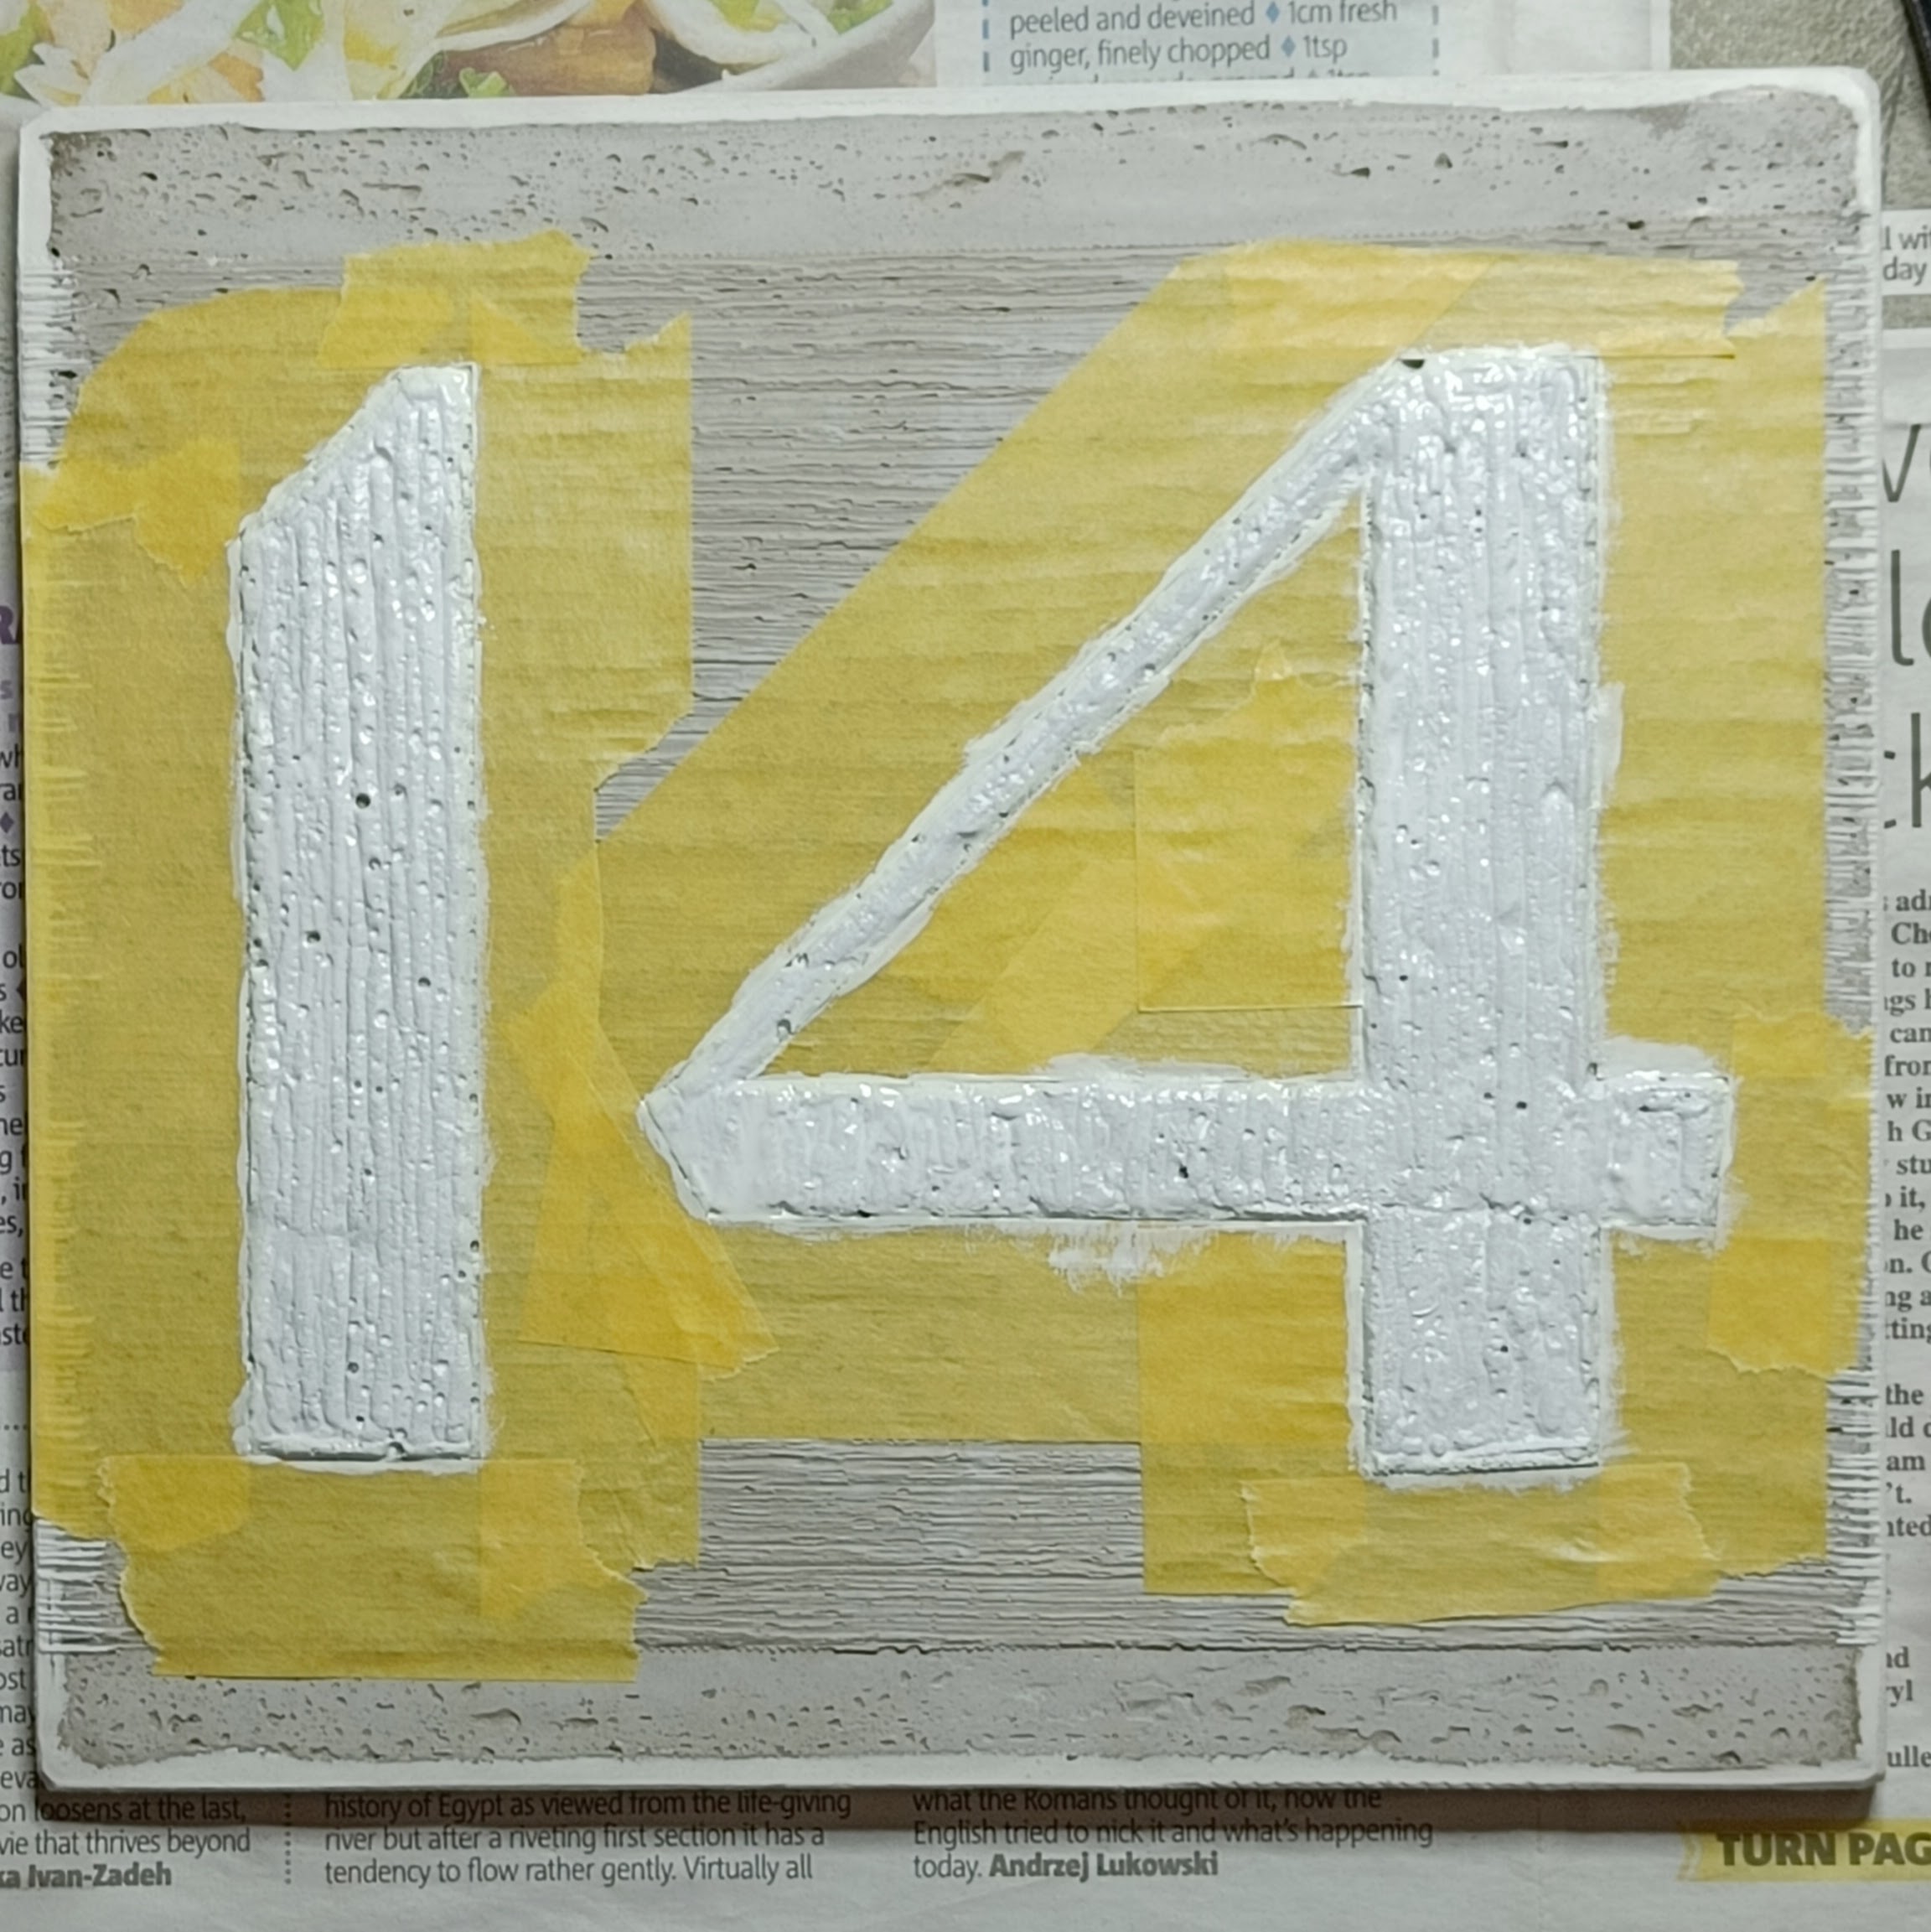
My plan is to paint the raised figure in white. And i think i’ll get a cleaner line if a tape up first, so i diligently tape round everything with Frogtape yellow. Including fiddly bits inside the counter of the 4 where i had to get the dissecting probe and a scalpel out.
I didn’t originally plan a design that only had straight lines, but that’s how it was, and it was better for taping.
Painting
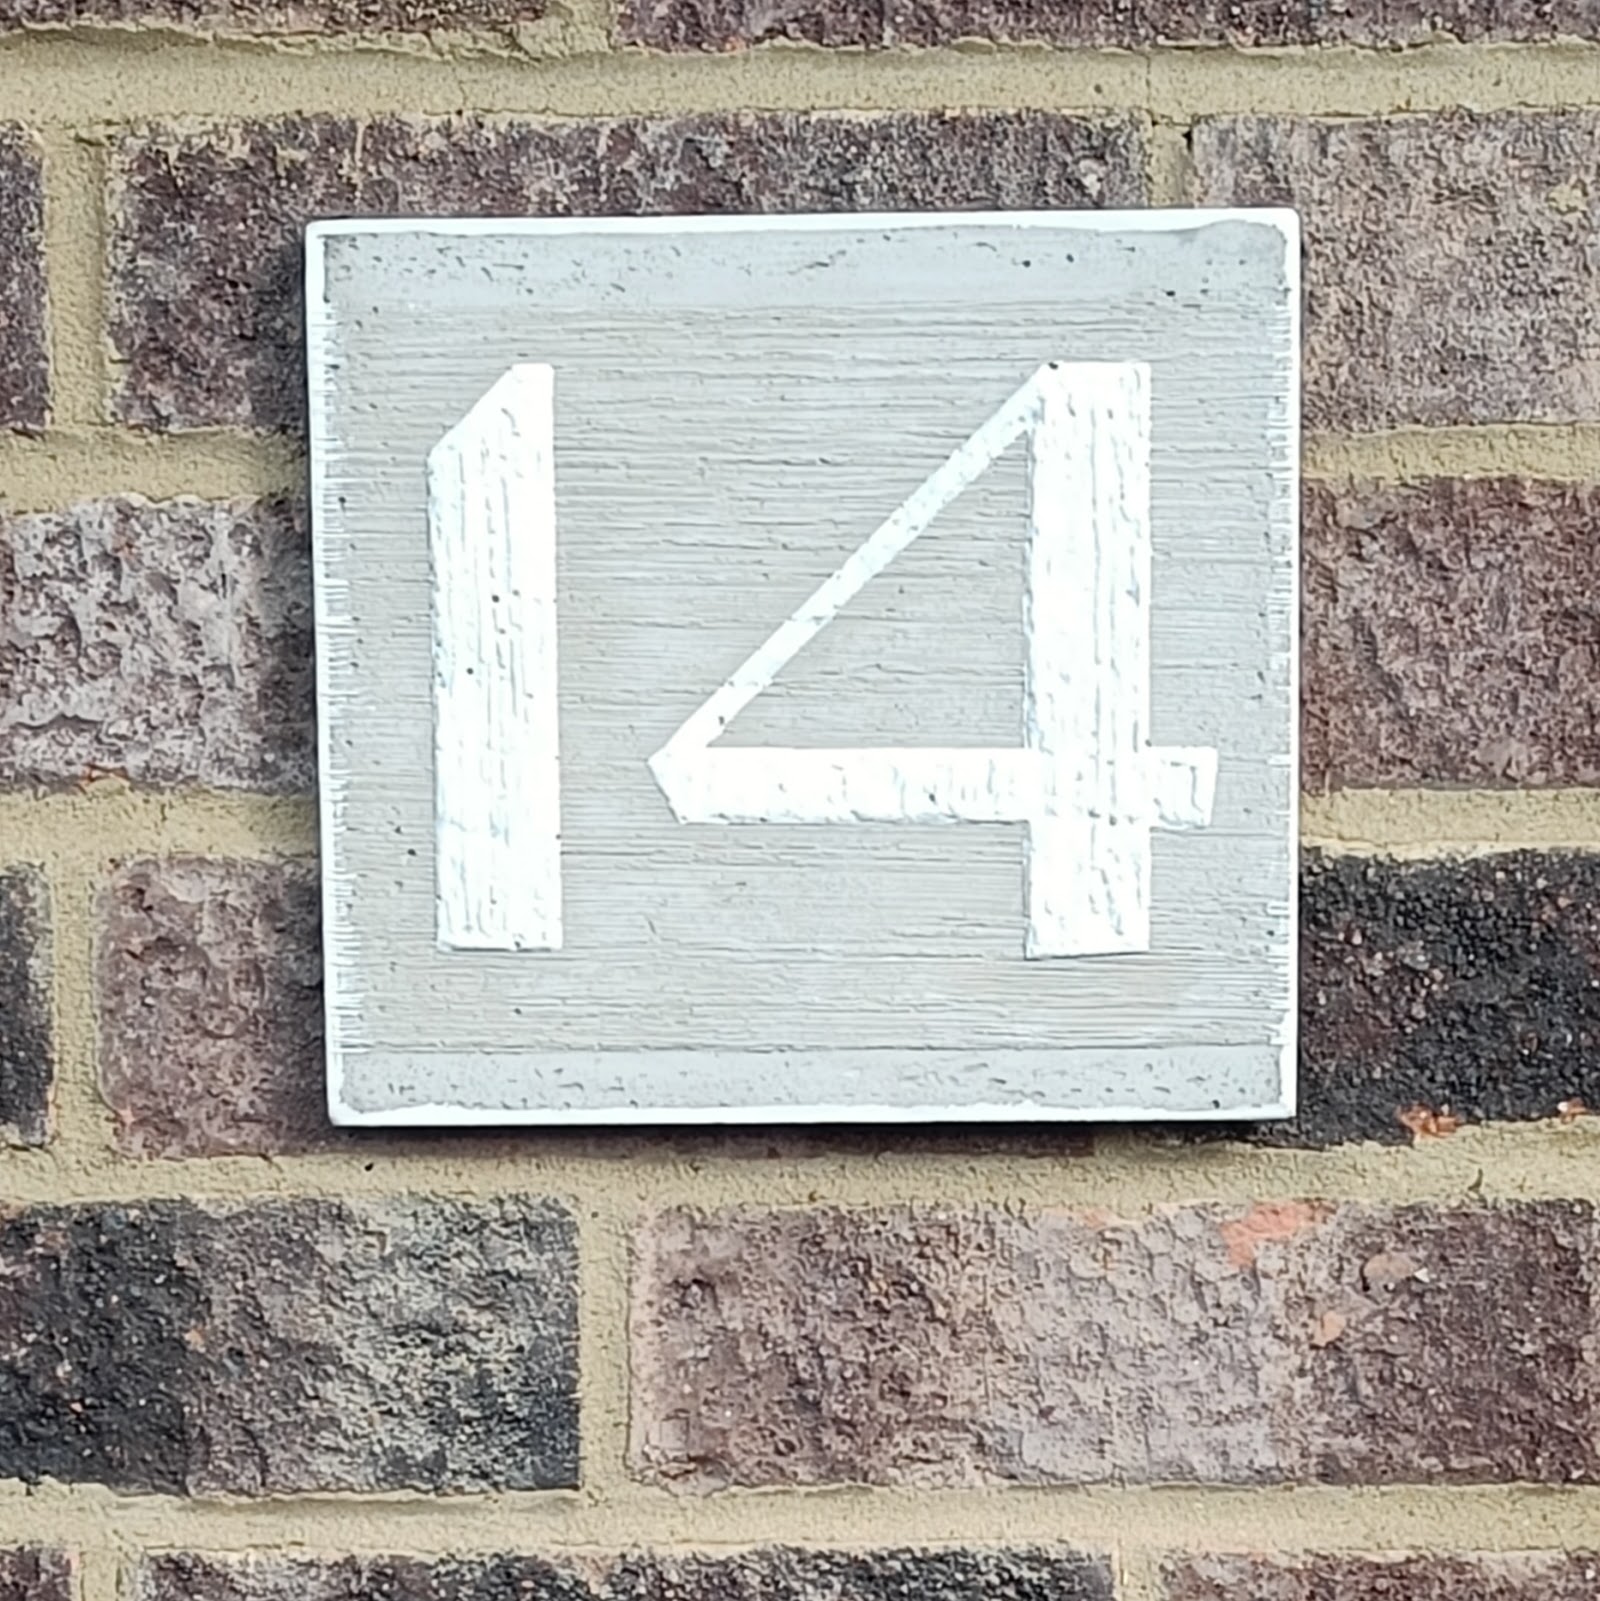
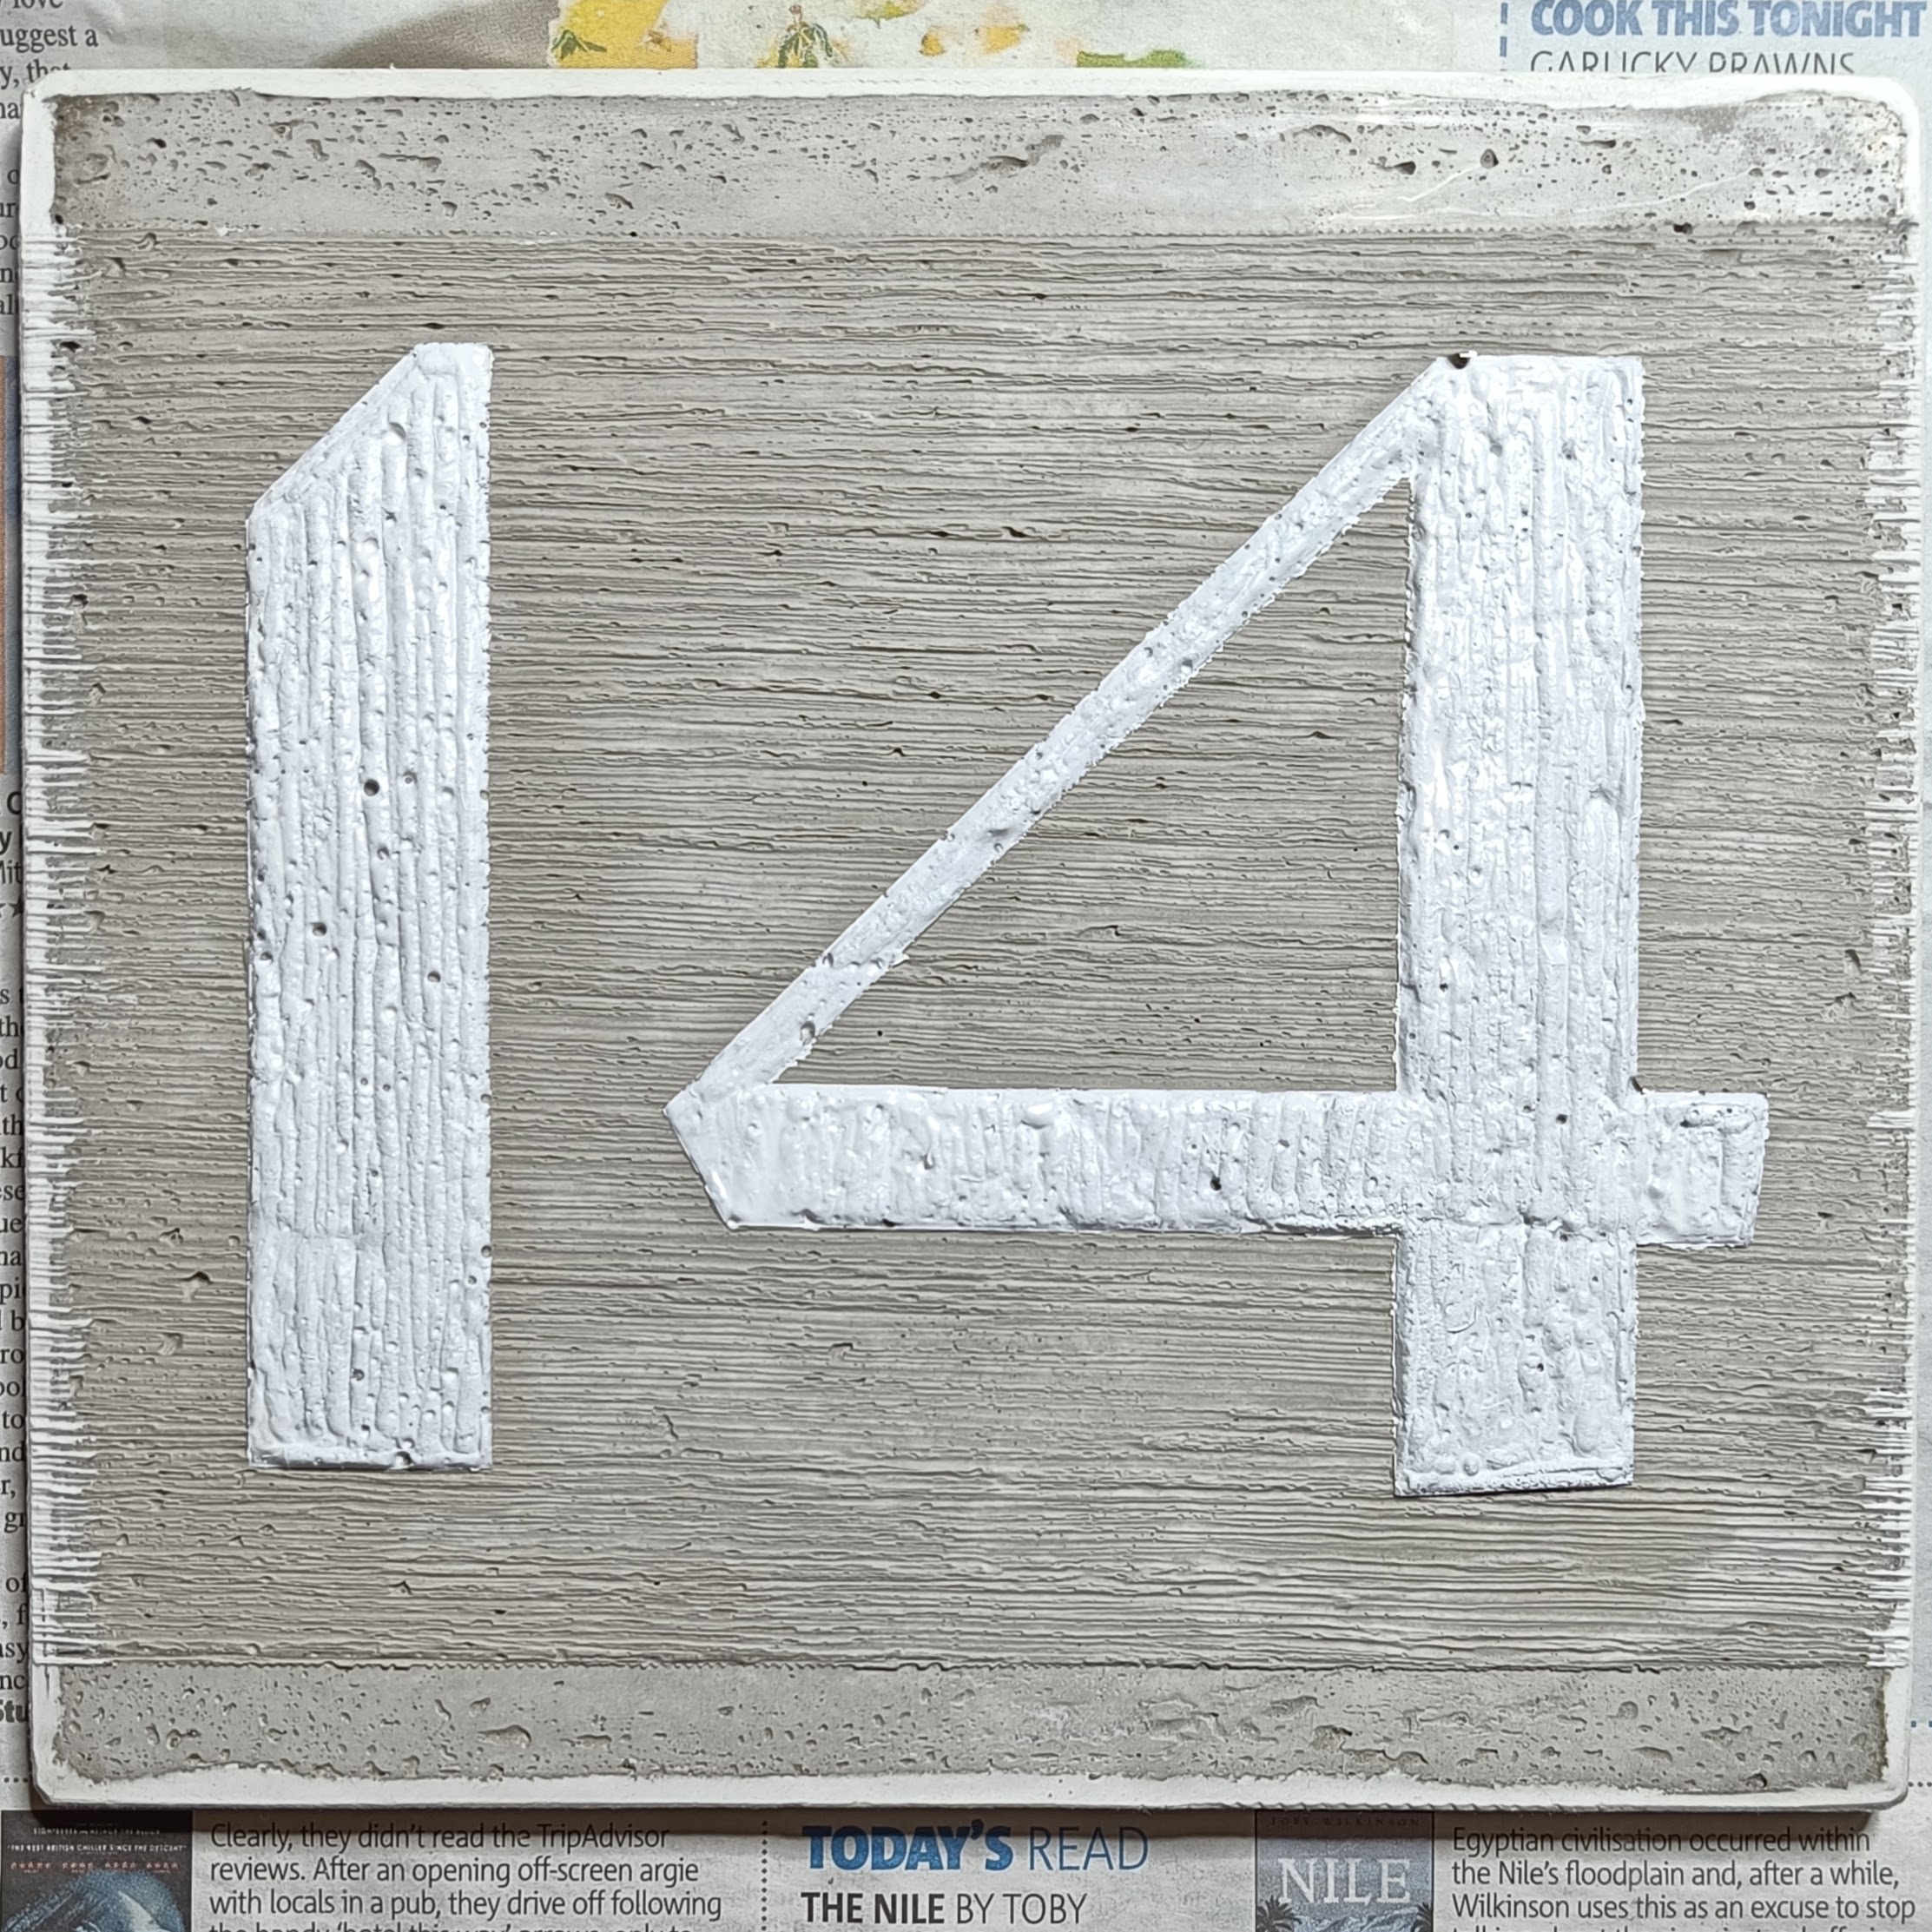
I used one of those little tins of Humbrol that i assume are popular with model railway enthusiasts. Two coats was enough, and though i think a third coat would have improved the density and the durability, i could also see that the paint was filling in some of the texture, so i stopped at two.
Looks nice with the tape peeled off.
Backend
So that’s the front. The back needed fixings so we could hang it on the wall.
The usual design for house number plaques is holes on the edge of the plaque and screw through them into the wall. I think that looks a bit naff.
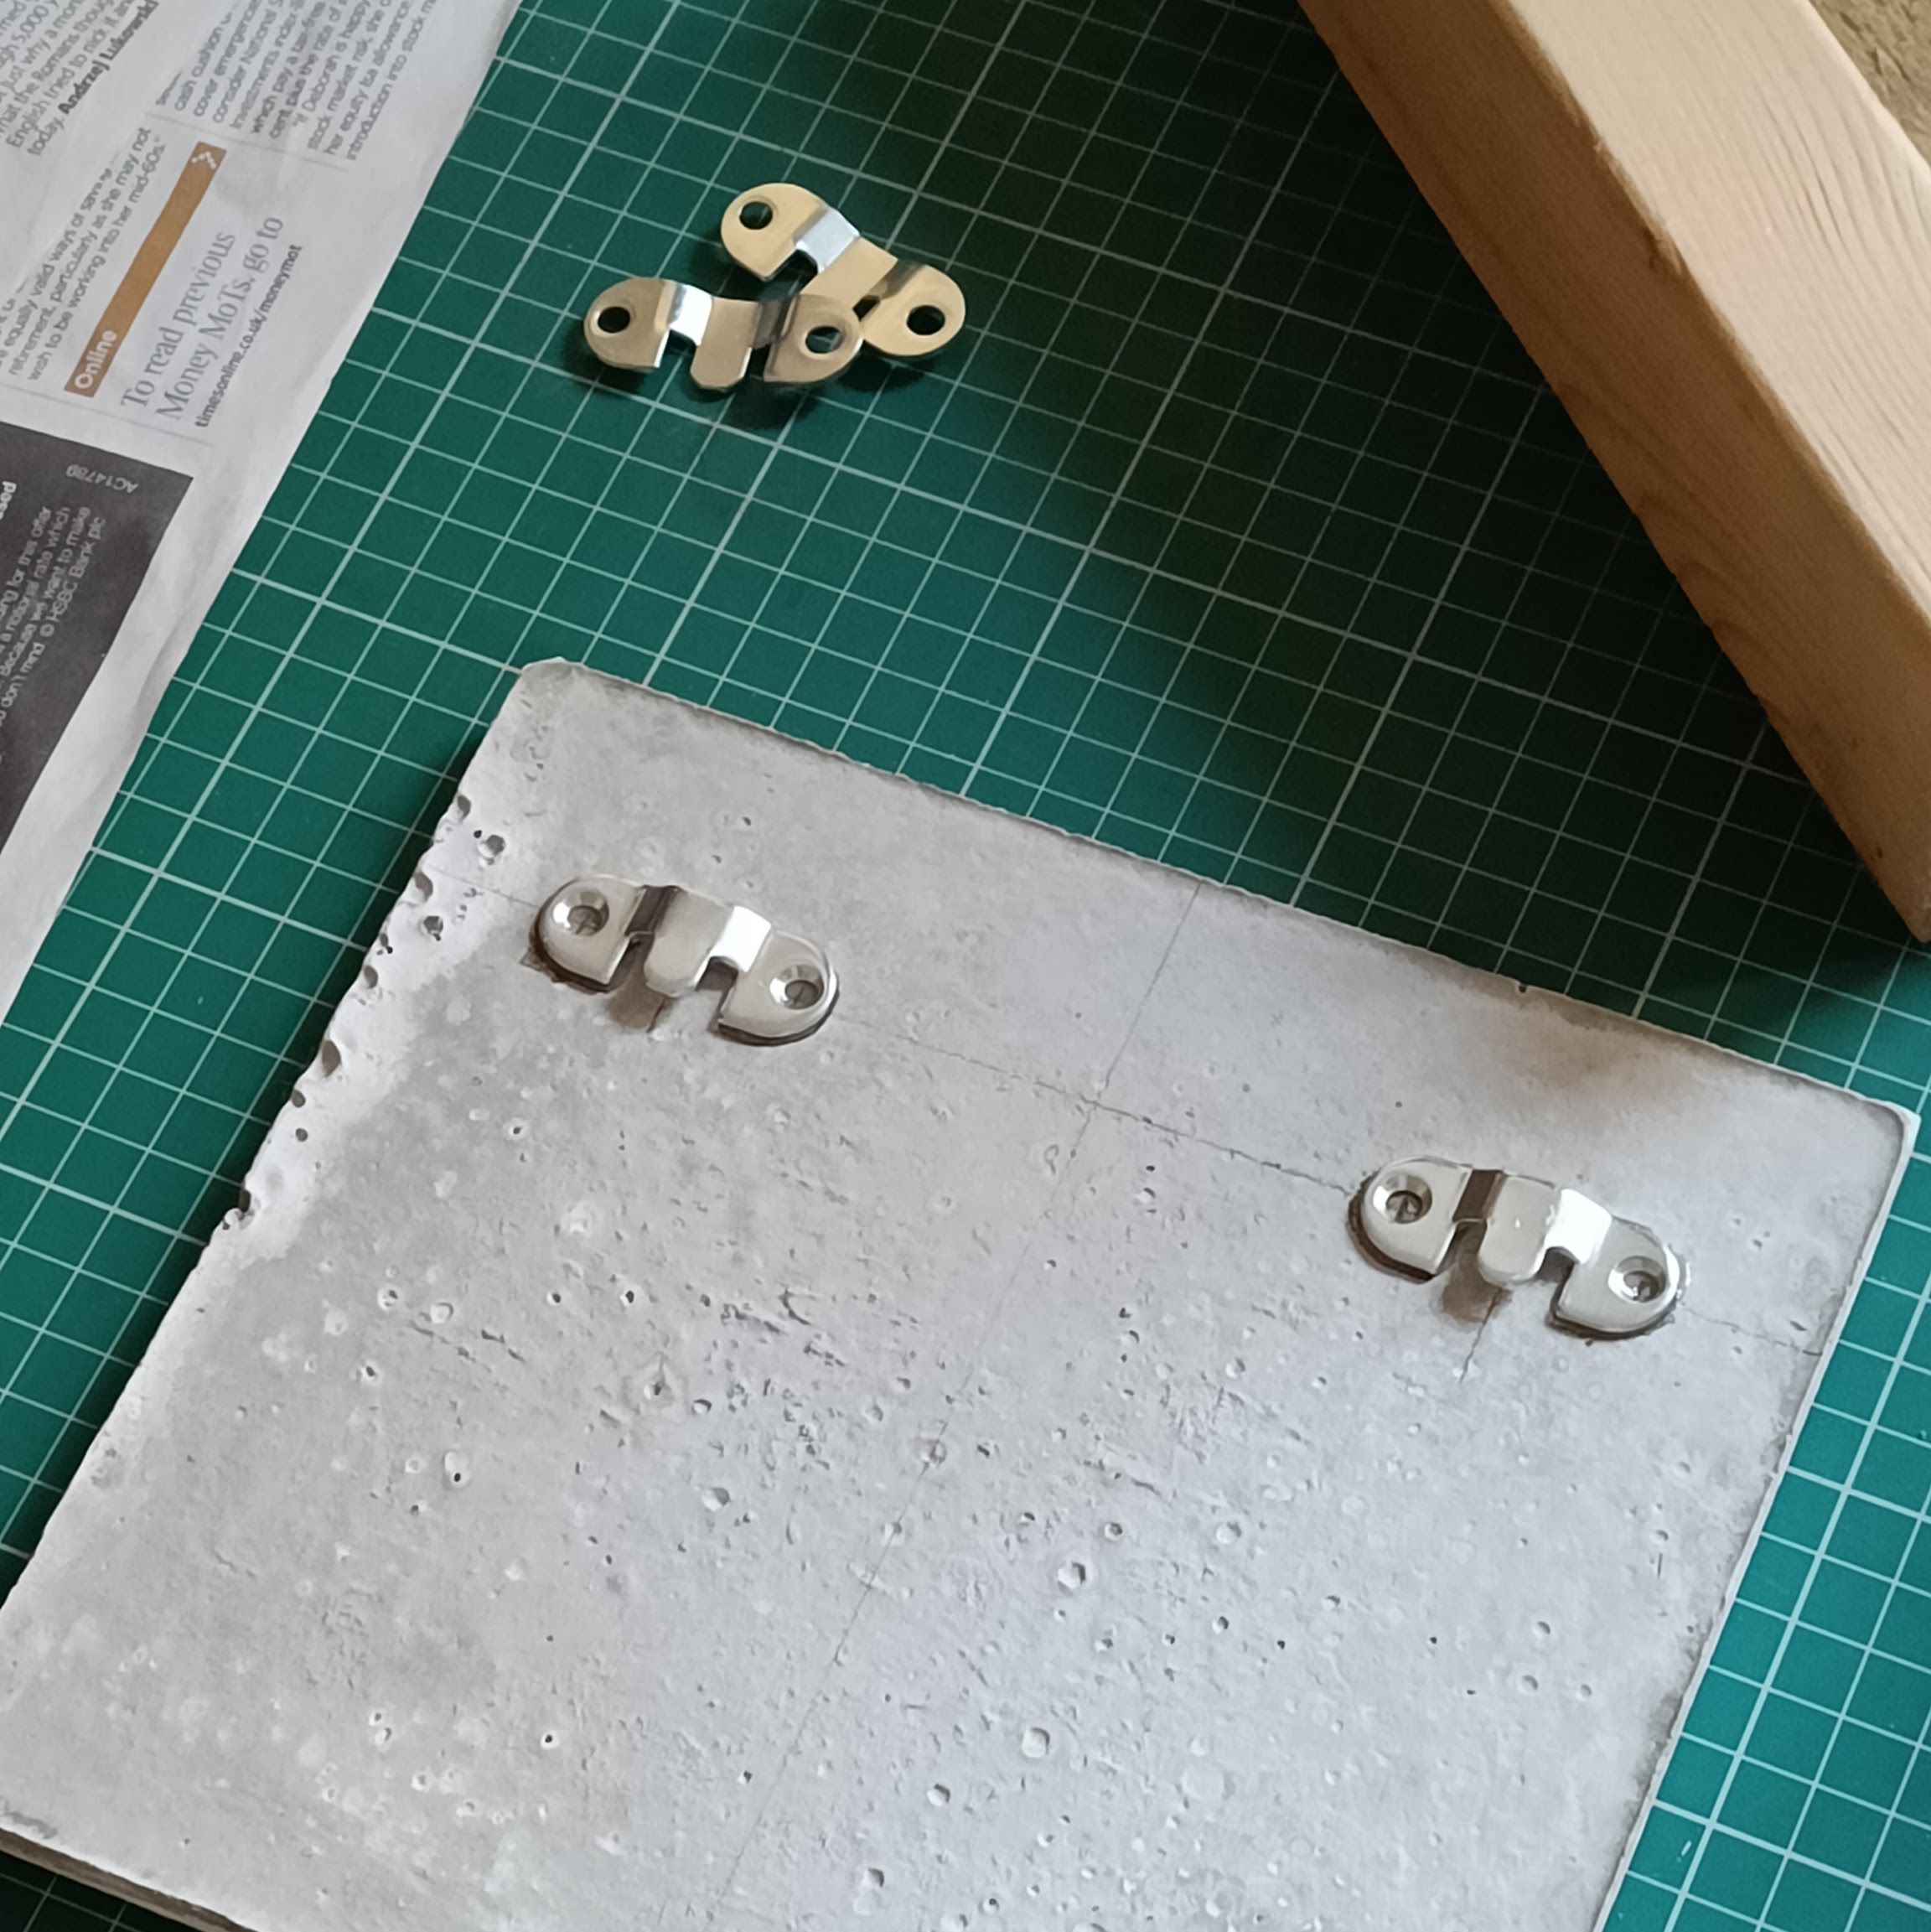
This is yet another part of this project where i am So Not Expert, but i found these hidden mounting plates at Fred Aldous. They have a simple design where two cleats have a projecting tooth and a recess that slide into each other. The clever bit is that the two parts have the same shape.
Ordinarily you screw one part into the wall and one part into your picture frame. But i am not screwing into the back of the concrete plaque. So i glued it with Araldite and borrowed some vintage pistol clamps from a friend.
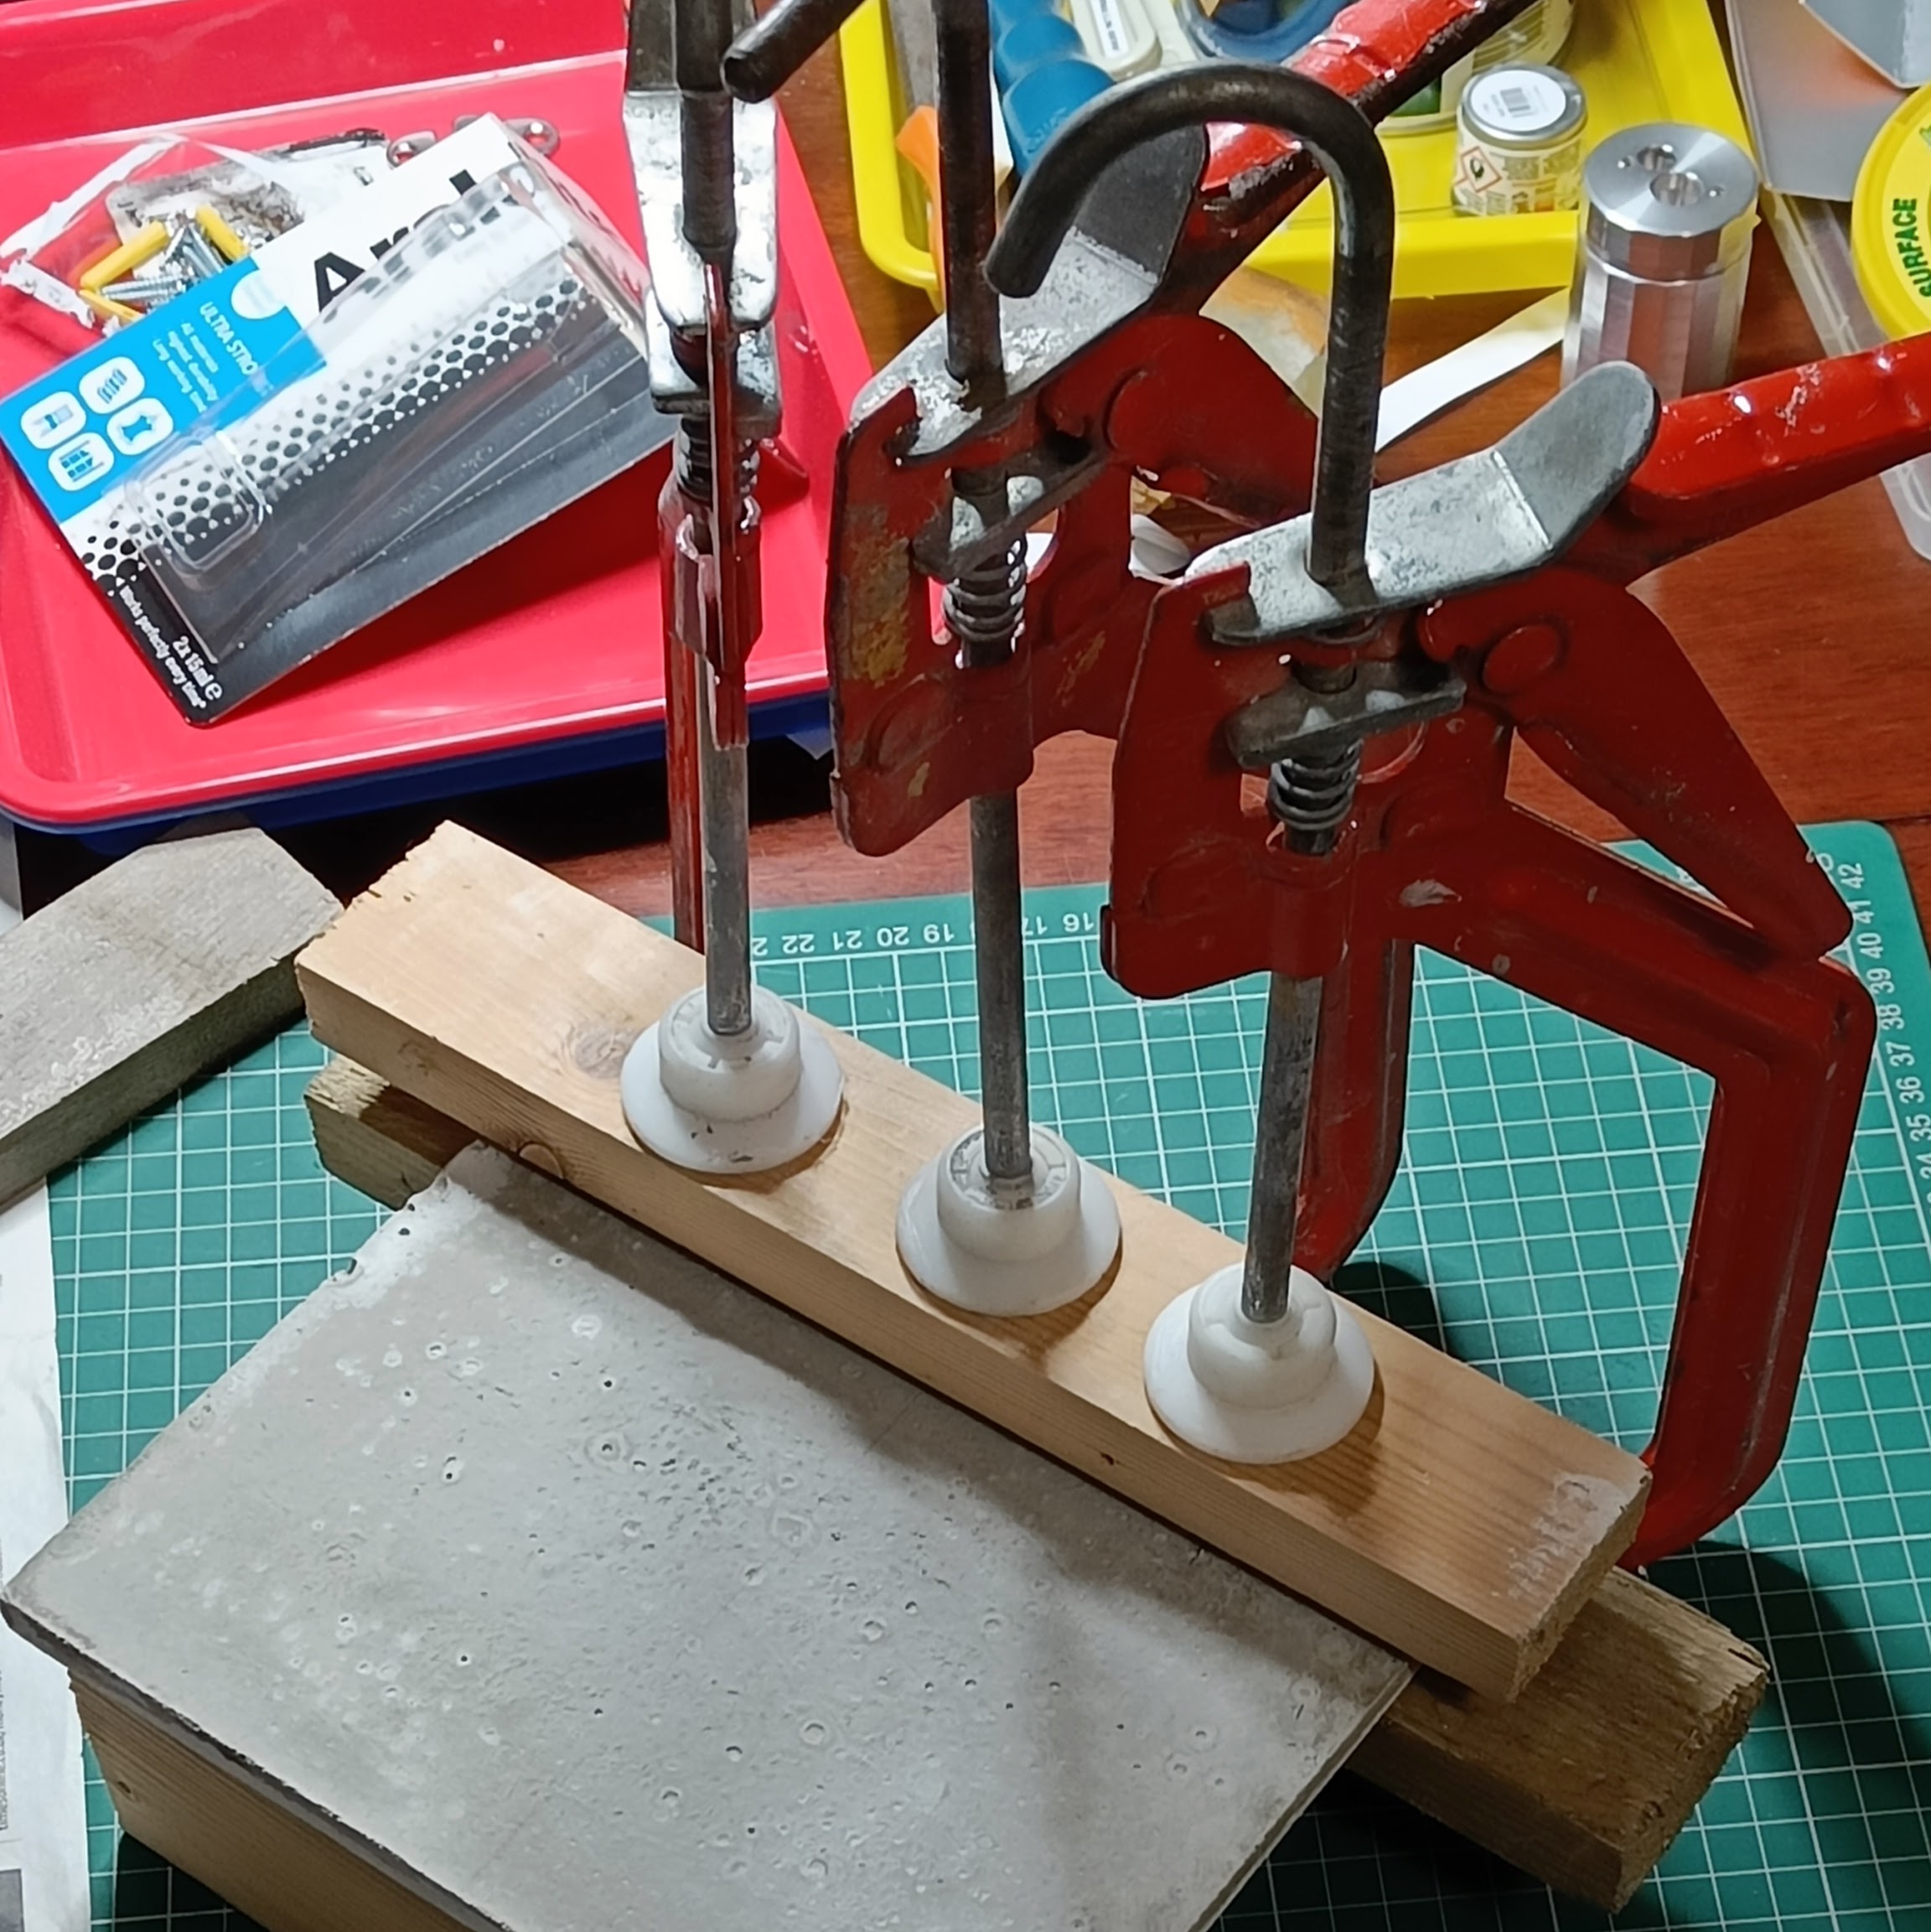
That worked quite well (it’s not dropped off so far!).
Drill Guide
One thing i did that i forgot to photograph is a drill guide. I put the wall-side mounts in place on the back and on a piece of tracing paper marked where the holes were. Quite simple but makes the drilling a bit easier: tape the drill guide onto the wall and drill through it.
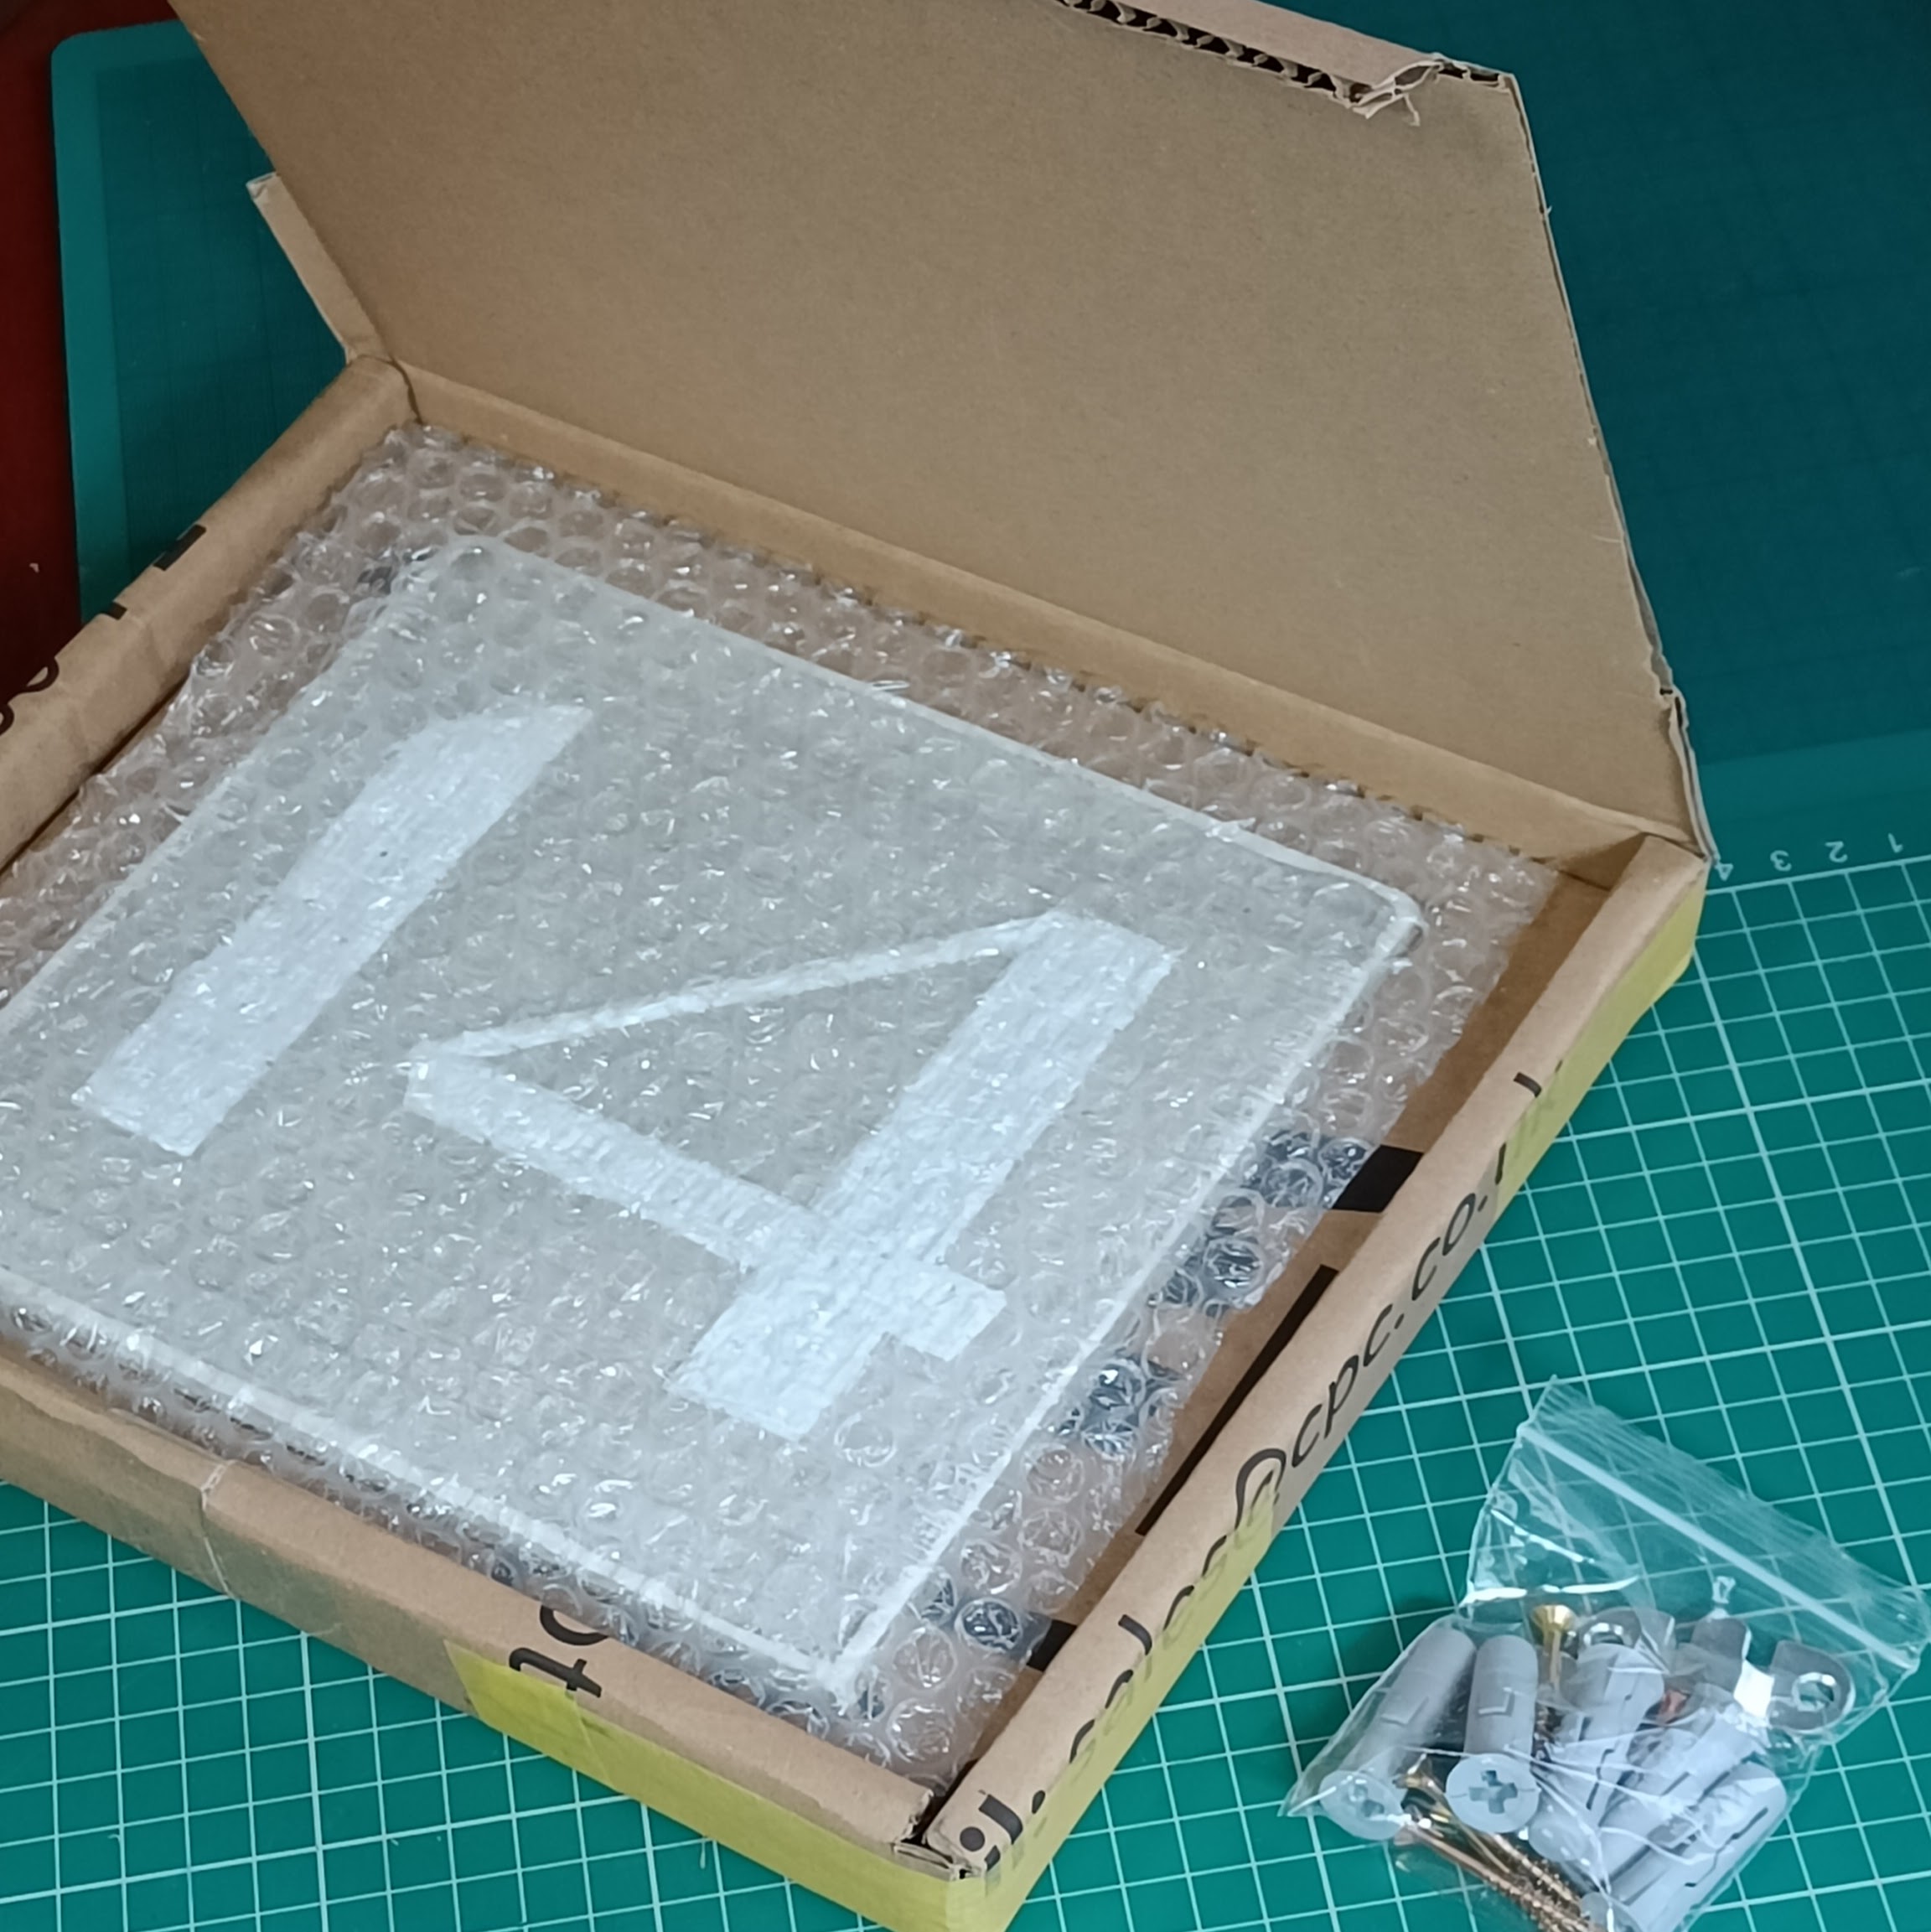
Boxed
I made a box by cutting, folding, and glueing a saved box from deliveries. Do not recommend. A jiffy bag would have been fine.
Job Done
With it all boxed up all that was left was to drive down to the site, eat a lot of cake, and install the plaque.